Fluted Mdf – Complete Guide for Indian Buyers
Research-backed fluted mdf breakdown with pros/cons, tables, and a clear decision checklist for Indian buyers and carpenters.
Quick Decision Summary
Best answer in one line: Fluted MDF is a pre-grooved decorative panel ideal for accent walls, TV backdrops, and wardrobe shutters where you want vertical texture without custom routing.
If you're in a hurry: Fluted MDF panels come ready with machined grooves (typically 15mm to 30mm spacing), saving labour and routing costs. Standard sizes in India are 8×4 feet with thickness ranging from 12mm to 18mm. They work well in dry interior zones but need sealed edges and proper backing in humid areas. Choose paintable variants for custom colours or pre-laminated options for faster installation.
- Choose this if: You want a ribbed/linear texture for walls or furniture without CNC investment, need faster site turnaround, or prefer paintable surfaces for colour matching.
- Avoid this if: The installation zone faces direct water splash, prolonged humidity above 70%, or you need curved applications without flexible variants.
What Fluted MDF Actually Is
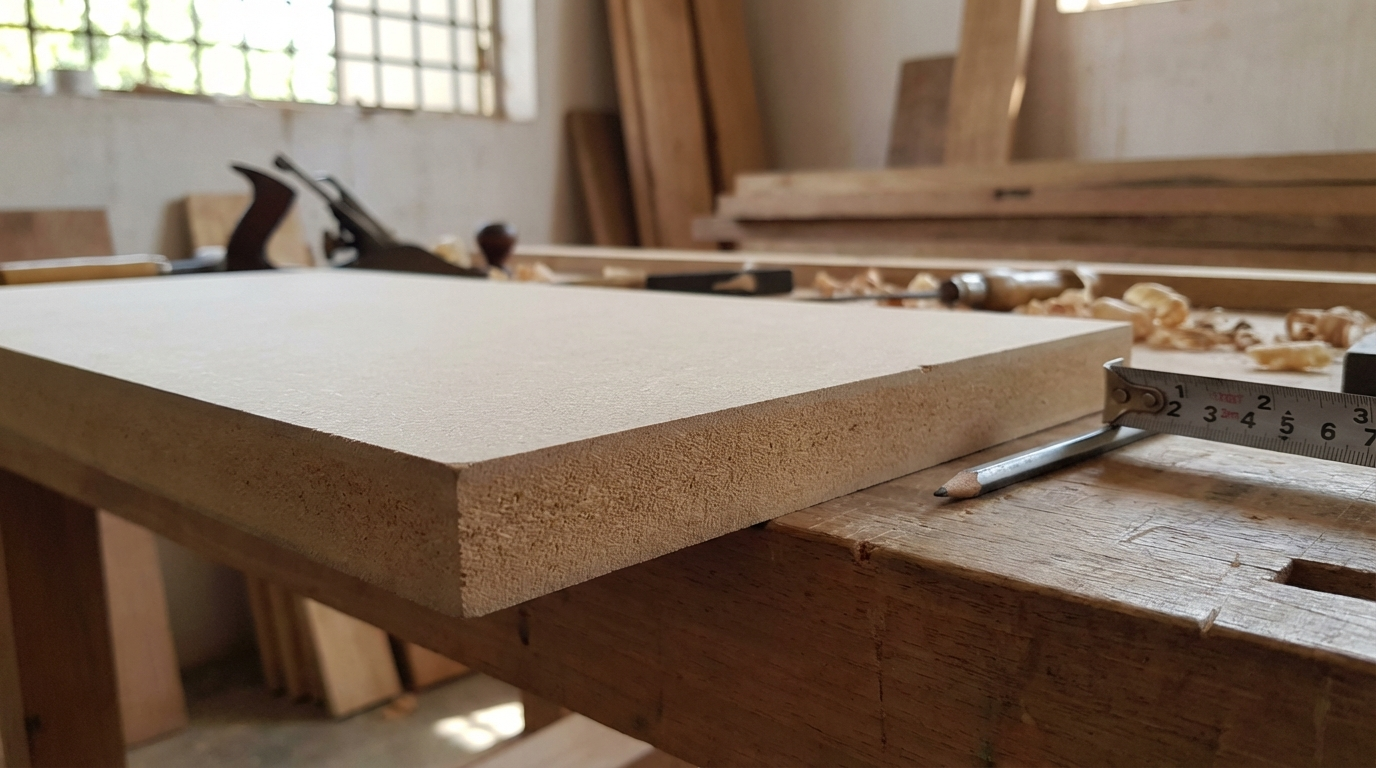
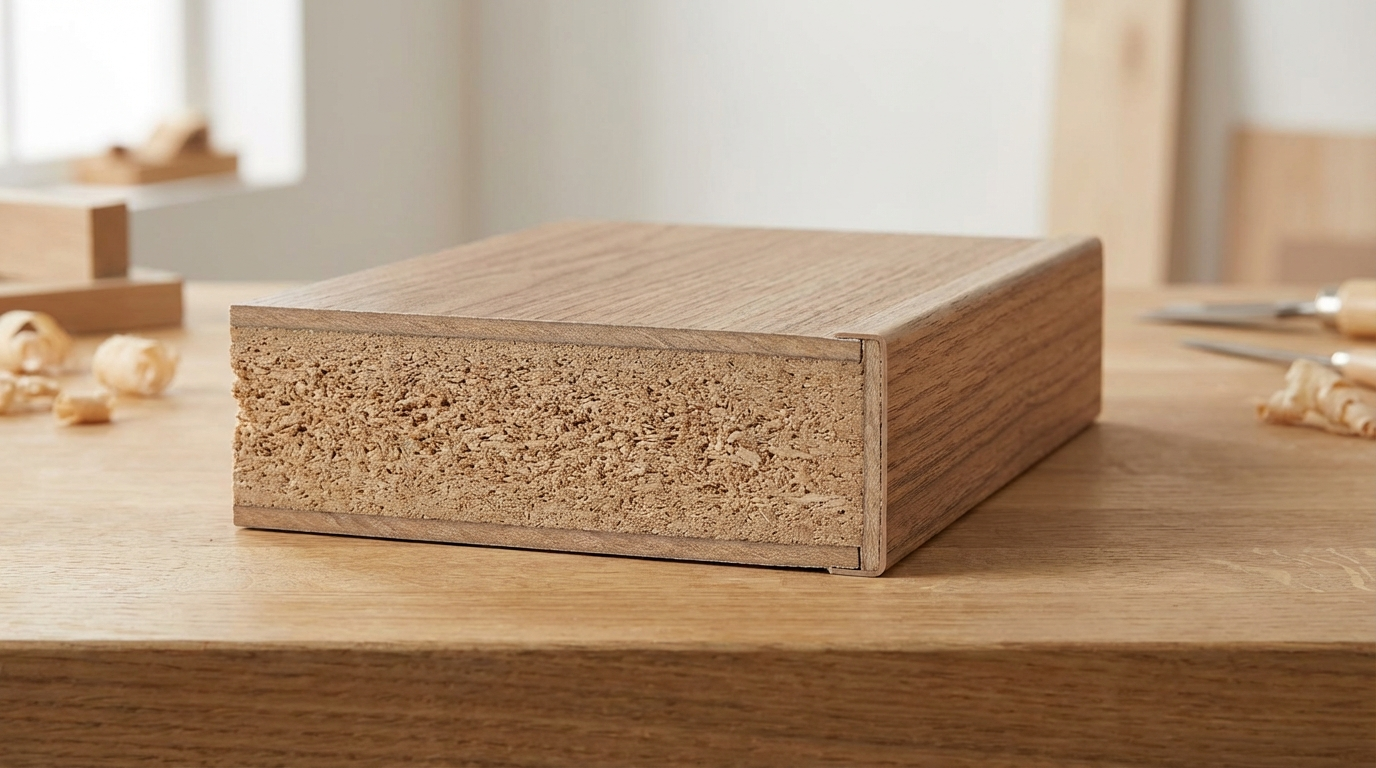
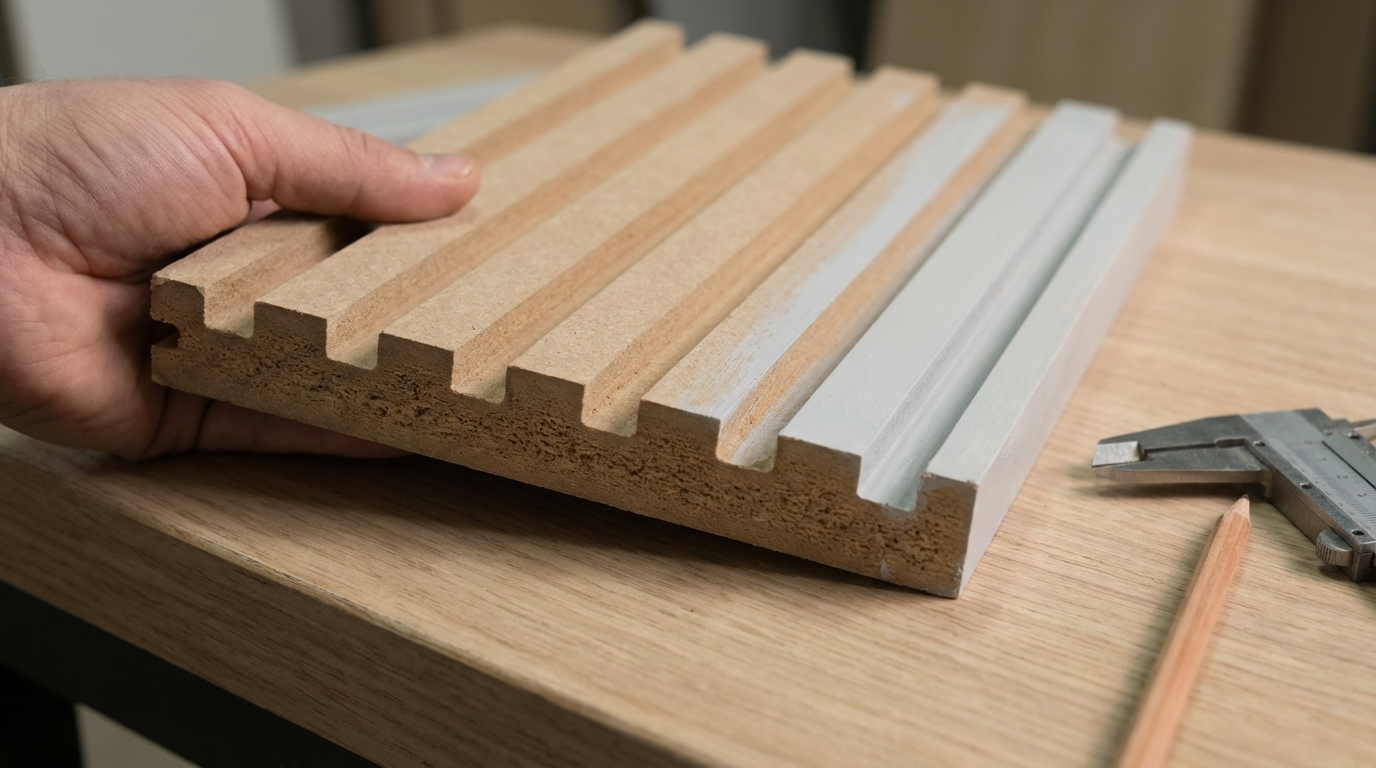
Fluted MDF is a factory-machined medium-density fibreboard panel with parallel vertical or horizontal grooves cut into one face. The grooves create a ribbed, linear texture that adds visual depth to flat surfaces. Unlike plain MDF that requires separate CNC routing to achieve patterns, fluted MDF arrives ready to install.
The base material remains standard MDF—wood fibres bonded under heat and pressure with synthetic resin. The fluting is typically cut using precision CNC machines, creating consistent groove depth (usually 3mm to 8mm) and spacing (commonly 15mm, 20mm, or 30mm pitch).
What Is the Difference Between Fluted MDF and Regular MDF?
Regular MDF has smooth, flat surfaces on both faces, requiring additional machining if you want decorative grooves. Fluted MDF eliminates this step entirely since the grooves are pre-cut at the factory. This means less dust generation on site, consistent groove quality across panels, and faster installation timelines. However, regular MDF offers more flexibility for custom patterns since you control the routing design. Fluted MDF locks you into the specific groove pattern you purchase. For standard linear textures, fluted panels save 30-40% labour time compared to routing plain MDF on site.
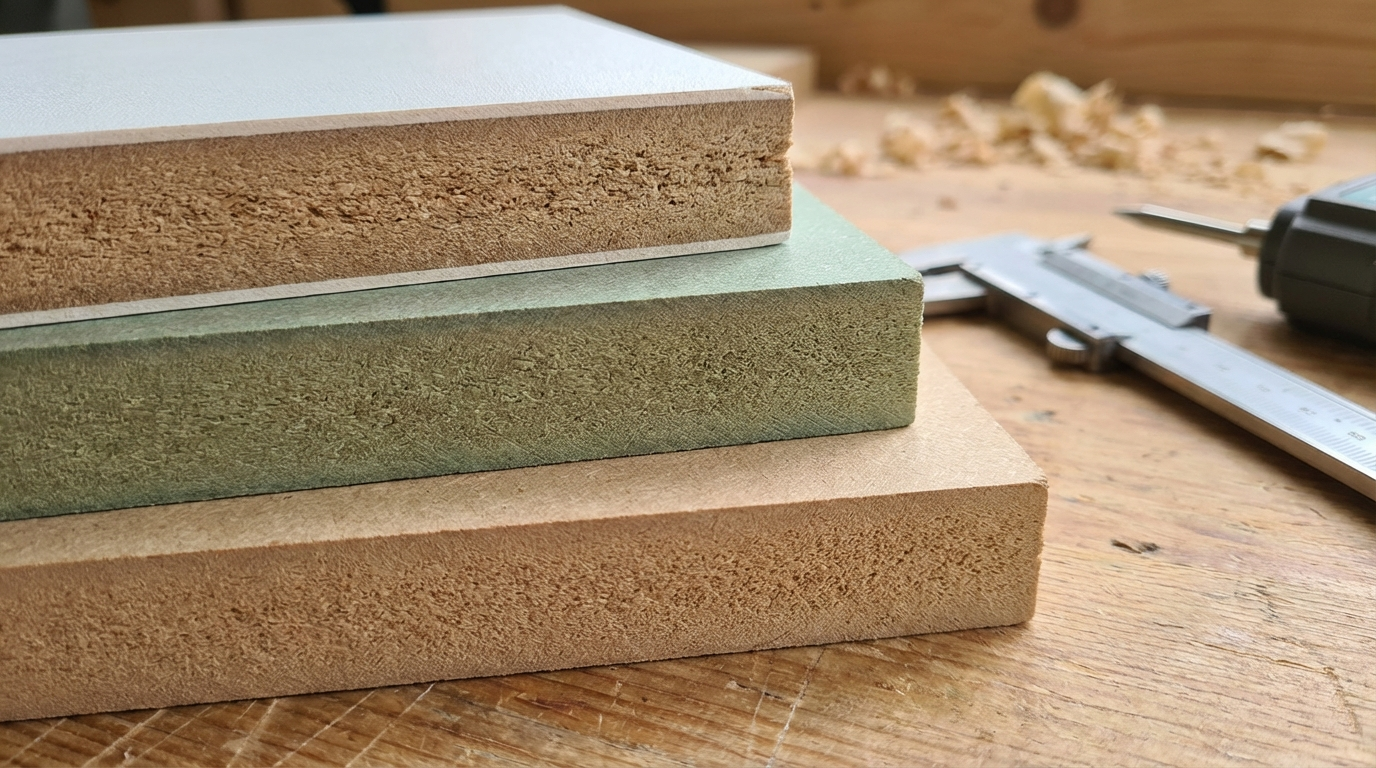
Types of Fluted MDF Available in Indian Markets
Indian dealers typically stock three main variants. First, paintable fluted MDF comes with a raw or primed surface ready for paint application—this is the most common type priced in the ₹130–180 per square foot range depending on thickness and groove pattern. Second, pre-laminated fluted MDF (also called prelam fluted) has a melamine or decorative paper finish factory-applied, reducing finishing time but limiting colour customisation. Third, flexible fluted MDF has thinner cross-cuts on the back allowing the panel to bend for curved installations like rounded columns or reception counters. Flexible variants cost 25-40% more than standard rigid panels.
Why Fluted MDF Matters in Indian Homes and Sites
Indian interior projects face unique challenges that affect how fluted MDF performs. Understanding these helps you avoid costly failures.
Monsoon and Coastal Humidity Impact
Standard fluted MDF absorbs moisture through exposed groove edges faster than flat MDF because the grooves increase surface area. In Mumbai, Chennai, or Kolkata where monsoon humidity regularly exceeds 80%, unsealed fluted panels can swell within weeks. The grooves may close slightly as the MDF expands, ruining the visual effect. Coastal cities face additional salt-air corrosion risk on any metal fixtures attached to the panels. For these zones, specify moisture-resistant MDF (often marked MR or HDFWR) as the base material, even if it costs 15-25% more.
Site Storage and Transport Realities
Fluted MDF panels are more fragile during transport than plain MDF. The groove edges chip easily if panels rub against each other or are dropped. Many Indian construction sites lack covered storage, exposing panels to rain or ground moisture. Always insist on vertical storage with cardboard separators between panels. Reject any delivery where panels show edge chips, groove damage, or moisture staining. A damaged fluted panel cannot be repaired—the groove pattern will never match after patching.
Workmanship Consistency
Pre-grooved panels reduce dependence on carpenter skill for the textured effect. In cities where finding experienced CNC operators is difficult, fluted MDF delivers consistent results. However, the joining and edge finishing still require skill. Poorly aligned joints between two panels create visible breaks in the groove pattern that ruin the linear flow.
Price Range and Cost Drivers
Fluted MDF pricing in India varies significantly based on several factors. Understanding these helps you budget realistically and negotiate better.
| Fluted MDF Type | Thickness Range | Typical Price (₹ per sq ft) | Key Cost Driver |
|---|---|---|---|
| Paintable (standard groove) | 12mm–18mm | 100–160 | Groove density, MDF grade |
| Paintable (fine groove) | 12mm–18mm | 130–190 | More grooves per panel |
| Pre-laminated (solid colours) | 12mm–18mm | 150–220 | Laminate quality, finish type |
| Pre-laminated (wood grain) | 12mm–18mm | 170–250 | Design complexity, texture |
| Flexible fluted MDF | 9mm–12mm | 180–280 | Kerf cuts, bending radius |
| Moisture-resistant base | 12mm–18mm | 160–240 | MR resin, density |
Budget Estimator Example: 10×8 Feet Accent Wall
For a standard bedroom accent wall of 80 square feet using paintable fluted MDF (18mm, standard groove):
- Material: 80 sq ft × ₹140 average = ₹11,200
- Wastage (10%): ₹1,120
- Edge banding/finishing: ₹800–1,200
- Paint (primer + two coats): ₹2,500–3,500
- Labour (installation + painting): ₹3,000–4,500
- Total estimated range: ₹18,600–21,500
How to Ask for a Quote: Checklist
- Specify exact dimensions needed (length × width × quantity)
- Mention groove pitch requirement (15mm, 20mm, 30mm, or custom)
- Clarify MDF grade (standard, MR, or HDF base)
- State thickness required (12mm, 15mm, or 18mm)
- Ask if price includes GST and delivery
- Request sample piece to verify groove quality
- Confirm cutting charges if custom sizes needed
Practical Use Cases: What Works and What Fails
| Application | Recommended Thickness | Finish Notes | Risk Notes |
|---|---|---|---|
| TV unit backdrop | 15mm–18mm | Paintable or prelam | Ensure backing support; avoid unsupported spans over 4 feet |
| Bedroom accent wall | 12mm–18mm | Paintable preferred for custom colours | Low risk if dry zone; seal all edges |
| Wardrobe shutter face | 18mm | Prelam for durability | Heavy use zone; ensure hinge reinforcement |
| Living room partition | 18mm both sides | Match groove direction across faces | Sound transmission through grooves; add insulation if needed |
| Reception counter face | 12mm (flexible variant) | Prelam for commercial durability | High abuse zone; use MR grade |
| Kitchen cabinet shutter | 18mm MR grade | Prelam only; avoid paintable | High humidity; groove edges trap grease |
| Bathroom vanity (dry zone) | 18mm HDFWR | Prelam with edge sealing | Never use near shower splash zone |
| Ceiling panels | 9mm–12mm | Paintable for weight reduction | Ensure adequate fixing; check sag risk |
Can Fluted MDF Be Used in Kitchens?
Yes, but with strict conditions. Kitchen environments expose panels to cooking steam, grease splatter, and cleaning chemicals. Use only moisture-resistant grade fluted MDF (marked MR or HDFWR) with pre-laminated finish—never paintable variants in kitchens. The grooves trap grease over time, making cleaning harder than flat surfaces. Position fluted panels away from the cooking hob area where steam concentration is highest. For shutter applications, seal all edges including groove ends with PVC edge banding or paint sealer. Regular cleaning with damp cloth (not wet) prevents grease buildup in grooves.
Design Ideas You Can Actually Build
Living Room Applications
- Full-height TV backdrop: Use 18mm paintable fluted MDF floor-to-ceiling; paint in muted grey or off-white; vertical grooves elongate ceiling height visually
- Floating entertainment console: Horizontal fluted panel behind wall-mounted TV; integrate LED strip in one groove channel for ambient lighting
- Feature wall with mixed materials: Combine fluted MDF (painted black) with natural stone or veneer panels for contrast
- Room divider screen: Double-sided fluted panels in wooden frame; use 12mm for weight reduction; paint both sides same colour
Bedroom Applications
- Headboard wall: Floor-to-ceiling fluted backdrop in dusty pink or sage green; extend 2 feet beyond bed width each side
- Wardrobe shutter replacement: Retrofit existing shutters with fluted prelam panels; handle-less design using groove as finger pull
- Dressing area accent: Horizontal fluted panel behind mirror; integrate concealed lighting in groove channels
- False ceiling edge detail: Use 9mm fluted MDF as ceiling periphery cove; paint to match ceiling colour
Commercial and Office Applications
- Reception desk front: Flexible fluted MDF wrapped around curved counter; prelam finish in wood grain for warmth
- Conference room focal wall: Full wall fluted treatment in charcoal grey; integrate brand logo cutout in centre
- Cabin partition: Fluted MDF panels in aluminium frame system; allows reconfiguration without damage
- Retail display backdrop: White prelam fluted panels; grooves allow shelf bracket insertion without visible fixings
Common Buyer Mistakes and How to Avoid Them
Mistake 1: Ignoring Groove Direction Planning
Many buyers order fluted MDF without confirming whether grooves run along the 8-foot or 4-foot dimension. Installing panels with mismatched groove directions creates jarring visual breaks. Always specify groove orientation when ordering and plan panel layout on paper before purchase.
Mistake 2: Using Standard MDF in Humid Zones
Assuming all MDF performs equally leads to swelling failures within months. Standard fluted MDF absorbs moisture through groove edges faster than flat panels. For bathrooms (dry zones), kitchens, or coastal cities, always specify moisture-resistant base material—ask for MR grade or HDFWR explicitly.
Mistake 3: Skipping Edge Sealing
Exposed edges—including groove ends—are moisture entry points. Many installations skip proper edge treatment to save time. Use PVC edge banding, wood filler, or paint sealer on all exposed edges. For grooved ends, apply primer inside grooves before painting.
Mistake 4: Ordering Without Physical Sample
Groove spacing, depth, and edge crispness vary between manufacturers. Ordering large quantities based on catalogue images leads to disappointment. Always request a sample piece (most suppliers provide 1×1 feet samples) and check groove consistency under angled light.
Mistake 5: Inadequate Backing Support
Fluted MDF is slightly weaker than plain MDF due to material removed during grooving. Mounting panels without proper backing framework causes sagging or cracking over time. Use wooden battens at 12-18 inch intervals behind wall-mounted panels.
Mistake 6: Using Wrong Fasteners
Standard wood screws may not hold well in grooved zones where material is thinner. Using oversized screws causes surface cracking. Place screws only in flat zones between grooves, or use construction adhesive combined with mechanical fasteners.
Mistake 7: Ignoring Acclimatisation
Installing panels immediately after delivery causes warping as the MDF adjusts to room humidity. Store panels horizontally in the installation room for 48-72 hours before mounting. This is especially critical in air-conditioned spaces with controlled humidity.
Mistake 8: Improper Joint Alignment
When multiple panels meet, groove lines should align perfectly for visual continuity. Rushing installation without checking alignment creates visible breaks. Use a straight edge across joints during installation and adjust before adhesive sets.
Failure Modes and Fixes
Failure Mode 1: Edge Swelling at Groove Ends
Symptom: Puffy, raised edges at panel ends where grooves terminate; grooves appear to close up.
Likely Root Cause: Moisture absorption through unsealed groove channels; common in monsoon months or near wet zones.
Prevention: Apply two coats of primer inside groove channels before installation; seal all cut edges with PVC banding or wood sealer.
If Already Happening: Sand affected edges carefully, apply wood hardener, seal with epoxy-based sealer, repaint. Severe cases require panel replacement.
Failure Mode 2: Groove Chipping During Cutting
Symptom: Ragged, splintered groove edges after panel cutting; chips along groove lines.
Likely Root Cause: Using dull blades or wrong blade type; cutting with groove side facing up on table saw.
Prevention: Use sharp carbide-tipped blades with 60+ teeth; cut with decorative groove side facing down; apply masking tape along cut line before cutting.
If Already Happening: Fill minor chips with wood filler, sand smooth, prime and paint. Deep chips may remain visible under paint.
Failure Mode 3: Paint Peeling Inside Grooves
Symptom: Paint flaking or peeling specifically inside groove channels while flat surfaces remain intact.
Likely Root Cause: Insufficient primer penetration into grooves; paint applied too thick causing poor adhesion.
Prevention: Apply primer with brush into grooves before roller application; use thinned first coat; ensure complete coverage inside groove corners.
If Already Happening: Scrape loose paint, sand grooves, reapply primer with brush, repaint with thinner coats.
Failure Mode 4: Panel Warping After Installation
Symptom: Installed panel develops bow or twist; edges lift away from backing wall.
Likely Root Cause: Uneven moisture absorption (one side sealed, other exposed); inadequate backing support; no acclimatisation period.
Prevention: Seal both faces equally; install proper backing framework; acclimatise panels for 48-72 hours in installation space.
If Already Happening: Remove panel, check for moisture damage, add additional backing supports, reinstall with better fixings. Severe warping requires replacement.
Failure Mode 5: Visible Joint Lines Between Panels
Symptom: Dark lines or shadows visible where two panels meet; groove pattern appears broken.
Likely Root Cause: Panels from different production batches; poor alignment during installation; uneven lighting highlighting gaps.
Prevention: Order all panels from same batch; verify groove matching before installation; use joint filler between panels; plan lighting to minimise shadow casting on joints.
If Already Happening: Fill gap with matching wood filler, sand smooth, repaint joint area. Consider adding a trim strip if gap is too large.
Failure Mode 6: Fixture Pullout from Grooved Areas
Symptom: Screws or fixtures pulling out of panel; shelves sagging; hooks falling.
Likely Root Cause: Fasteners placed in grooved zones where material thickness is reduced; wrong screw length or type.
Prevention: Place all fasteners in flat zones between grooves only; use wall anchors for heavy loads; add backing plywood behind mounting points.
If Already Happening: Fill damaged holes with epoxy filler, relocate fixtures to flat zones, add backing reinforcement for heavy items.
Decision Framework: Which Variant for Which Condition
| Your Condition | Recommended Choice | What to Verify Before Purchase |
|---|---|---|
| Dry interior zone (bedroom, living room) | Standard paintable fluted MDF, 12-18mm | Groove consistency; edge crispness; density (tap test for hollowness) |
| Coastal city or high humidity area | MR grade fluted MDF with prelam finish | Ask for moisture-resistant certification; check edge swell resistance on sample |
| Kitchen cabinet shutters | 18mm HDFWR fluted with prelam; sealed edges | Confirm HDFWR base; test laminate adhesion at groove corners |
| Curved applications (columns, counters) | Flexible fluted MDF, 9-12mm | Verify minimum bending radius; check kerf cut consistency on back |
| Heavy use commercial space | 18mm prelam fluted with MR base | Scratch resistance of laminate; edge impact resistance |
| Tight budget, dry zone only | Standard 12mm paintable fluted | Check for uniform density; avoid panels with visible fibre clumps |
| Custom colour requirement | Paintable fluted (primed if available) | Surface smoothness for paint adhesion; primer compatibility |
| Fast installation timeline | Pre-laminated fluted MDF | Stock availability; colour/pattern consistency across panels |
Quality Checks You Can Do Without Lab Tests
Before Buying: Visual and Physical Checks
- Groove consistency check: Hold panel at eye level with grooves running horizontally; sight along grooves—wavy lines indicate poor machining
- Edge crispness: Run finger along groove edges; sharp, clean edges indicate quality; rounded or fuzzy edges suggest dull cutting tools or low-density MDF
- Density tap test: Tap panel with knuckles in multiple spots; hollow sound in some areas indicates density variation; uniform dull thud is good
- Thickness verification: Use vernier caliper or ruler at multiple points including grooved areas; thickness should match specification within 0.5mm
- Moisture staining: Check for grey or dark patches indicating past moisture exposure; reject panels with any water damage signs
- Batch consistency: If ordering multiple panels, verify all come from same production batch for colour and groove matching
After Cutting: Workmanship Cues
- Cut edge inspection: Clean cut edges show uniform fibre distribution; dark spots or voids indicate adhesive inconsistency
- Groove integrity: Check that cutting didn't cause groove chipping; apply masking tape on future cuts
- Smell test: Strong formaldehyde odour after cutting suggests higher emission levels; ensure adequate ventilation during work
- Dust quality: Fine, uniform dust is normal; large chunks or fibre clumps indicate low-quality bonding
After Installation: Long-Term Quality Indicators
- Joint alignment check: Use straight edge across panel joints weekly for first month; any movement indicates inadequate fixing
- Edge seal integrity: Check sealed edges for lifting or gaps; reapply sealer if gaps appear
- Groove cleaning: Dust accumulation in grooves is normal; easy removal with dry brush indicates intact surface; sticky residue suggests finish breakdown
- Moisture monitoring: In humid zones, check groove edges monthly for swelling signs; early detection allows intervention before damage spreads
Persona-Specific Guidance
For Homeowners: Durability and Maintenance
Do:
- Dust grooves weekly with soft brush or vacuum with brush attachment
- Wipe flat surfaces with slightly damp cloth; dry immediately
- Keep room humidity below 65% with ventilation or dehumidifiers
- Use felt pads under items placed against fluted surfaces
- Address any edge lifting immediately with wood adhesive
Don't:
- Use wet mop or excess water near fluted panels
- Apply harsh chemicals or abrasive cleaners
- Hang heavy items directly on grooved zones
- Ignore early signs of swelling or discolouration
- Allow direct AC airflow on panels (causes uneven moisture loss)
For Carpenters: Cutting, Edge Prep, and Installation
- Cutting: Use 60-tooth carbide blade minimum; cut groove side facing down on table saw; apply masking tape along cut line to reduce chipping
- Edge preparation: Sand cut edges with 180-grit before sealing; apply primer into groove channels with brush before roller work
- Fastening zones: Place all screws in flat areas between grooves; pre-drill to prevent cracking; use construction adhesive as primary bond
- Hinge areas: Add backing reinforcement for hinge mounting; never place hinges where screw enters grooved zone
- Handling: Store vertically with cardboard separators; carry panels face-to-face; avoid dragging across surfaces
- Joint treatment: Use panel adhesive in butt joints; clamp until set; fill visible gaps with matching filler before painting
For Architects and Designers: Specifications and Detailing
- Specification writing: Specify groove pitch (15mm/20mm/30mm), groove depth (3mm-8mm), base material grade (standard/MR/HDFWR), thickness, and finish type separately
- Wet-zone precautions: Maintain minimum 300mm clearance from direct water sources; specify HDFWR grade within 2 meters of water points
- Finish logic: Paintable for custom colours but adds site time; prelam for speed but limits colour options; matte finishes hide groove imperfections better than gloss
- Lighting consideration: Side lighting emphasises groove texture dramatically; front lighting flattens effect; plan lighting angles at design stage
- Acoustic note: Grooved surfaces scatter sound slightly better than flat MDF; not significant acoustic treatment but marginally reduces flutter echo
- Drawing details: Show groove direction on elevation drawings; indicate panel break lines; specify edge treatment at all exposed edges
For OEM and Modular Manufacturers: Quality Control
- Incoming inspection: Check 10% random samples for groove consistency, thickness variation, and edge crispness before production batch approval
- Storage protocol: Climate-controlled storage ideal; if not possible, sealed plastic wrapping prevents moisture absorption
- Cutting standardisation: Create cutting templates that account for groove direction; avoid groove-breaking cuts where possible
- QC checkpoints: Post-cutting edge inspection; post-finishing groove integrity; pre-packing overall visual check
- Reducing returns: Most complaints stem from moisture damage (seal edges) and groove misalignment (batch control); address these two factors for 80% reduction in complaints
- Packaging: Face-to-face packing with foam separators; edge protectors on all corners; moisture barrier wrap for long-distance shipping
Trade-offs and Limitations: Honest Assessment
What Fluted MDF Does Well
- Delivers consistent groove quality without skilled CNC operator on site
- Reduces project timeline compared to routing plain MDF
- Paintable variants allow complete colour customisation
- Creates visual interest on flat walls at moderate cost
- Hides minor wall imperfections behind the panel
What Fluted MDF Does Not Do Well
- Not suitable for direct water contact or high-humidity zones without MR grade
- Grooves accumulate dust faster than flat surfaces
- Reduced structural strength compared to same-thickness plain MDF
- Pattern locked at purchase—no customisation possible later
- Joints more visible than plain MDF due to groove alignment requirements
- Cannot be easily trimmed for fit adjustments without revealing raw edges
Is Fluted MDF Worth the Extra Cost Over Plain MDF?
Fluted MDF typically costs 40-60% more than equivalent plain MDF. This premium is justified if you factor in saved labour for CNC routing (which alone can cost ₹50-80 per square foot for groove patterns) plus reduced site dust and faster installation. For small areas under 30 square feet, the savings are minimal—plain MDF with site routing may be comparable. For larger installations over 80 square feet, pre-grooved panels offer clear time and cost advantages. The decision hinges on your project size, timeline constraints, and local CNC routing costs. Get quotes for both approaches before committing.
FAQs
How thick should fluted MDF be for wall panelling?
For wall panelling applications, 12mm thickness works adequately in dry residential zones with proper backing support at 12-18 inch intervals. However, 15mm or 18mm thickness provides better rigidity, reduces visible backing framework requirements, and feels more substantial when touched. In commercial spaces with higher traffic or potential impact, always opt for 18mm. The thickness choice also affects paint absorption—thicker panels have more material mass and may show more consistent paint finish. Budget permitting, 18mm is the safer choice for any wall application.
Can fluted MDF be used for wardrobe shutters?
Yes, fluted MDF works well for wardrobe shutter faces, but with considerations. Use 18mm thickness for adequate rigidity on standard-height shutters. Pre-laminated variants are preferable over paintable ones for wardrobes since they resist fingerprints and scratches better during daily use. Ensure hinge mounting points fall in flat zones between grooves—never drill through grooves for hardware. For soft-close hinges, add backing reinforcement at mounting locations. Handle-less designs work elegantly with fluted shutters since a groove can serve as finger pull, eliminating visible hardware entirely.
How do you clean fluted MDF panels?
Regular maintenance involves weekly dusting with a soft-bristle brush or vacuum cleaner with brush attachment, working along the groove direction to remove accumulated dust. For deeper cleaning, use a slightly damp microfibre cloth on flat surfaces and dry immediately. Never use excess water, as it can seep into grooves and cause edge swelling. Avoid harsh chemicals, abrasive cleaners, or scouring pads. For kitchens where grease builds up in grooves, use mild dish soap solution sparingly, then dry thoroughly. Pre-laminated surfaces are easier to clean than painted ones.
What is the difference between fluted MDF and fluted plywood?
Fluted MDF has grooves cut into a homogeneous fibreboard substrate, resulting in consistent groove edges and smooth groove interiors. Fluted plywood has grooves cut into layered wood veneer, which can show ply separation at groove edges and has less consistent groove smoothness. MDF offers better paintability since its uniform composition accepts paint evenly. Plywood offers better screw-holding strength in grooved zones due to its layered structure. For painted applications, fluted MDF is superior. For natural wood finish or higher mechanical strength needs, fluted plywood may be preferable despite its higher cost.
Can fluted MDF be painted any colour?
Paintable fluted MDF accepts any standard wood primer and paint system, allowing unlimited colour customisation. Apply wood primer first—brush into grooves, then roll flat surfaces. Use two coats of acrylic or enamel paint for durability. Darker colours hide groove imperfections better than lighter ones. Gloss finishes emphasise groove texture dramatically but also show groove inconsistencies; matte or satin finishes are more forgiving. Pre-laminated fluted MDF cannot be painted effectively since the melamine surface resists paint adhesion. If you need specific colours not available in prelam, choose paintable variants.
How do you join two fluted MDF panels together?
Panel joints require careful planning for groove alignment. Butt joints are most common—apply panel adhesive to both edges, press together ensuring grooves align perfectly, and clamp until adhesive sets. Fill any visible gap with matching wood filler, sand smooth, and paint over. For larger installations, plan panel layout so joints fall in less visible areas or align with natural room features like corners. Some installers use thin aluminium or PVC trim strips to cover joints intentionally—this hides alignment imperfections but creates a deliberate design element rather than seamless appearance.
Is fluted MDF suitable for bathroom use?
Standard fluted MDF should never be used in bathrooms due to high humidity exposure. However, moisture-resistant (MR grade) or HDFWR fluted MDF can be used in dry zones of bathrooms—specifically areas that don't receive direct water splash or constant steam. This includes vanity fronts away from sinks, wall panels opposite to shower areas, and storage cabinet faces. Always use pre-laminated finish (not paintable) in bathrooms, seal all edges comprehensively, and maintain proper ventilation. Never use any MDF directly adjacent to showers, bathtubs, or toilet splash zones.
What causes fluted MDF edges to swell?
Edge swelling occurs when moisture penetrates the MDF through exposed fibres. Fluted panels are more susceptible because groove ends expose more surface area to moisture absorption. Common causes include installation in humid environments without proper sealing, water splashes reaching panel edges, ground moisture wicking up in floor-touching installations, and condensation in poorly ventilated spaces. Once swelling starts, it's difficult to reverse completely. Prevention is critical—seal all edges with primer, PVC banding, or wood sealer before installation, and address any water leaks immediately.
Can fluted MDF panels be bent for curved walls?
Standard rigid fluted MDF cannot bend—attempting to force curves will crack the panel. However, flexible fluted MDF variants are specifically designed for curved applications. These panels have kerf cuts (thin slits) on the back surface allowing controlled bending. The minimum bending radius depends on panel thickness and kerf spacing—typically 300mm to 600mm radius for 9mm-12mm flexible panels. Flexible variants cost 25-40% more than rigid panels. For tight curves below 300mm radius, consider alternative materials like bent plywood with applied fluted veneer or PVC fluted panels.
How long does fluted MDF last in Indian conditions?
With proper installation and maintenance, fluted MDF in dry interior zones can last 10-15 years without significant degradation. In humid coastal cities or semi-exposed locations, lifespan reduces to 5-8 years even with MR grade material. Key longevity factors include: initial edge sealing quality, ongoing humidity control (below 65% RH ideal), regular dust cleaning, and quick response to any moisture exposure events. Painted finishes may need refreshing every 3-5 years depending on UV exposure and cleaning frequency. Pre-laminated surfaces generally maintain appearance longer than painted ones.
What is the weight of fluted MDF panels?
Standard MDF weighs approximately 720-750 kg per cubic meter. An 8×4 feet (32 square feet) panel in 18mm thickness weighs roughly 35-40 kg. Fluted panels weigh slightly less than equivalent plain MDF due to material removed during grooving—typically 10-15% lighter. This weight reduction is minimal but can matter for ceiling applications or large wall installations. For overhead or ceiling work, 9mm or 12mm panels (weighing 18-25 kg per sheet) are preferred over 18mm to reduce structural loading and installation difficulty. Always calculate total weight when planning mounting framework capacity.
Do fluted MDF grooves affect acoustics?
Fluted surfaces scatter sound waves slightly better than flat surfaces, marginally reducing flutter echo in rooms. However, this effect is minor and should not be considered acoustic treatment. MDF itself has poor sound absorption properties regardless of surface texture. If you need acoustic improvement, consider acoustic-grade fluted panels with perforations and backing absorber, or add separate acoustic treatment behind decorative fluted panels. For home theatre or studio applications, fluted MDF serves only decorative purpose—dedicated acoustic panels are necessary for meaningful sound control.
Disclaimer: This content is provided for general informational purposes based on industry practices and publicly available information. Product specifications, standards, prices, and availability may vary by manufacturer, region, and time. Readers should independently verify details with manufacturers, dealers, or qualified professionals before making purchase or construction decisions.
Want Plywood Suggestions?
Share a few details and a VIR MDF specialist will suggest suitable brands and connect you to responsive dealers.