Prelam Board – Complete Guide for Indian Buyers
Research-backed prelam board breakdown with pros/cons, tables, and a clear decision checklist for Indian buyers and carpenters.
Quick Decision Summary
Best answer in one line: Prelam board is factory-finished MDF with decorative laminate bonded on both sides, offering ready-to-use convenience for furniture and interior applications across Indian homes.
If you're in a hurry: Prelam board eliminates on-site lamination work, reducing labour time by 40-60% compared to raw MDF. It's ideal for wardrobes, TV units, and modular kitchen shutters in dry to moderate humidity zones. Avoid it in direct water-contact areas like sink cabinets unless you opt for moisture-resistant grades. Standard prelam works well in most Indian cities, but coastal and high-humidity regions require HDHMR or MR-grade prelam specifically.
- Choose this if: You want faster project completion, consistent factory finish, and reduced site mess from lamination adhesives.
- Avoid this if: Your application involves direct water exposure, heavy structural loads, or you need custom veneer finishes not available in prelam catalogues.
What Prelam Board Actually Is
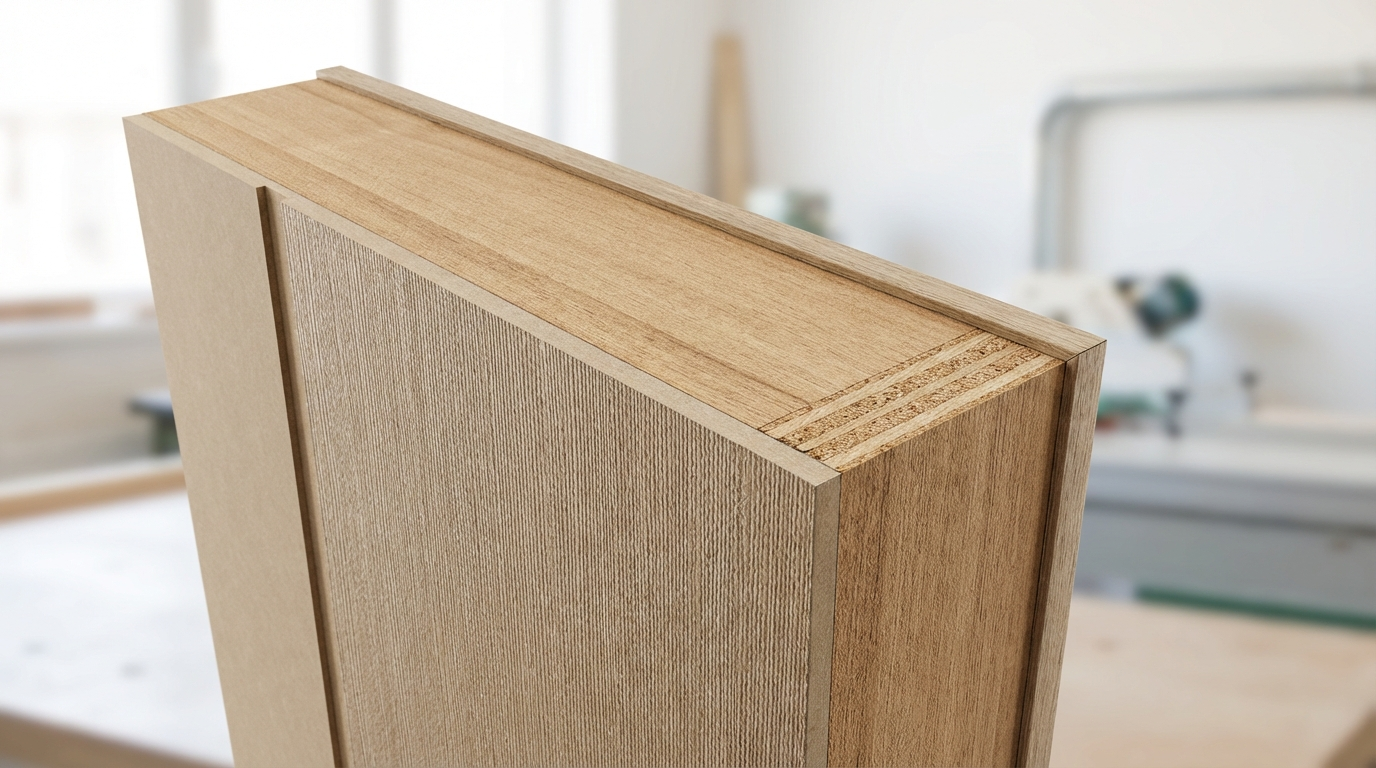
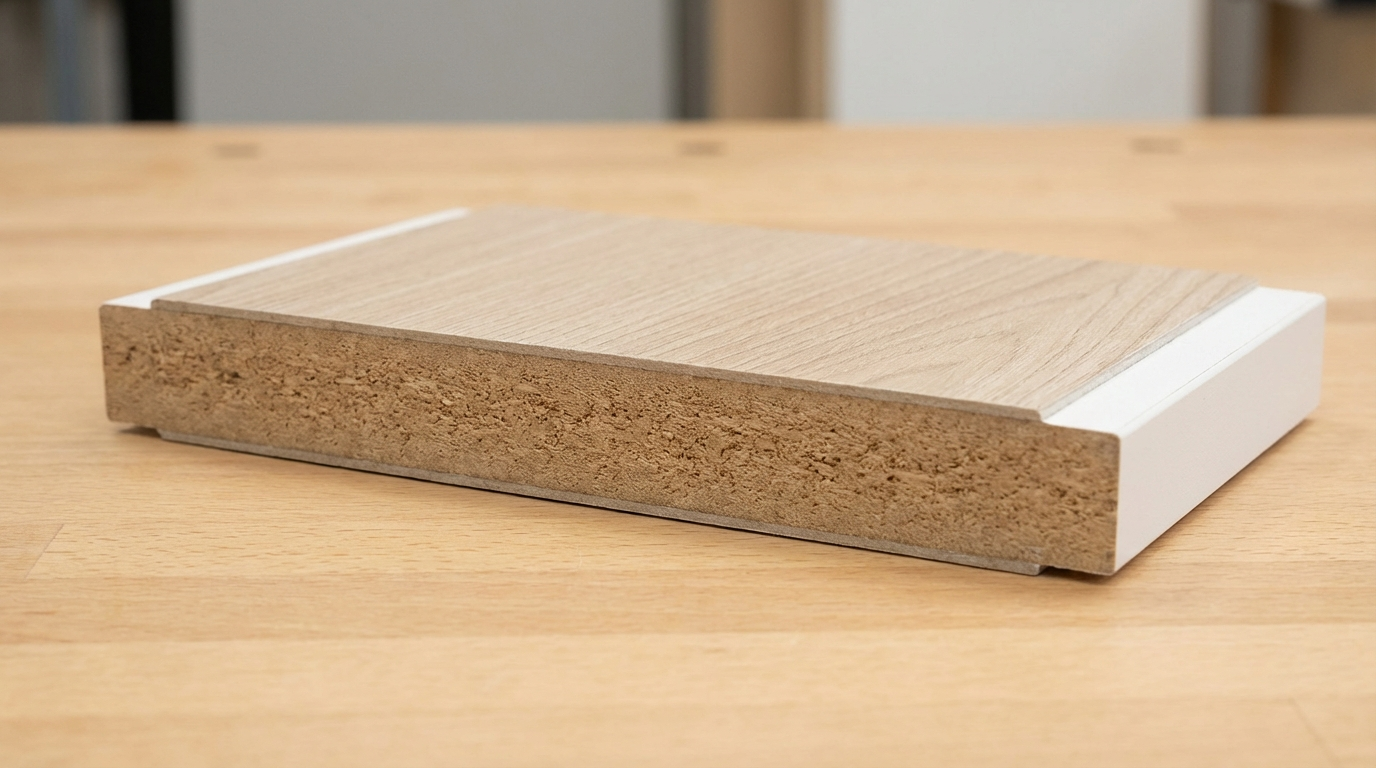
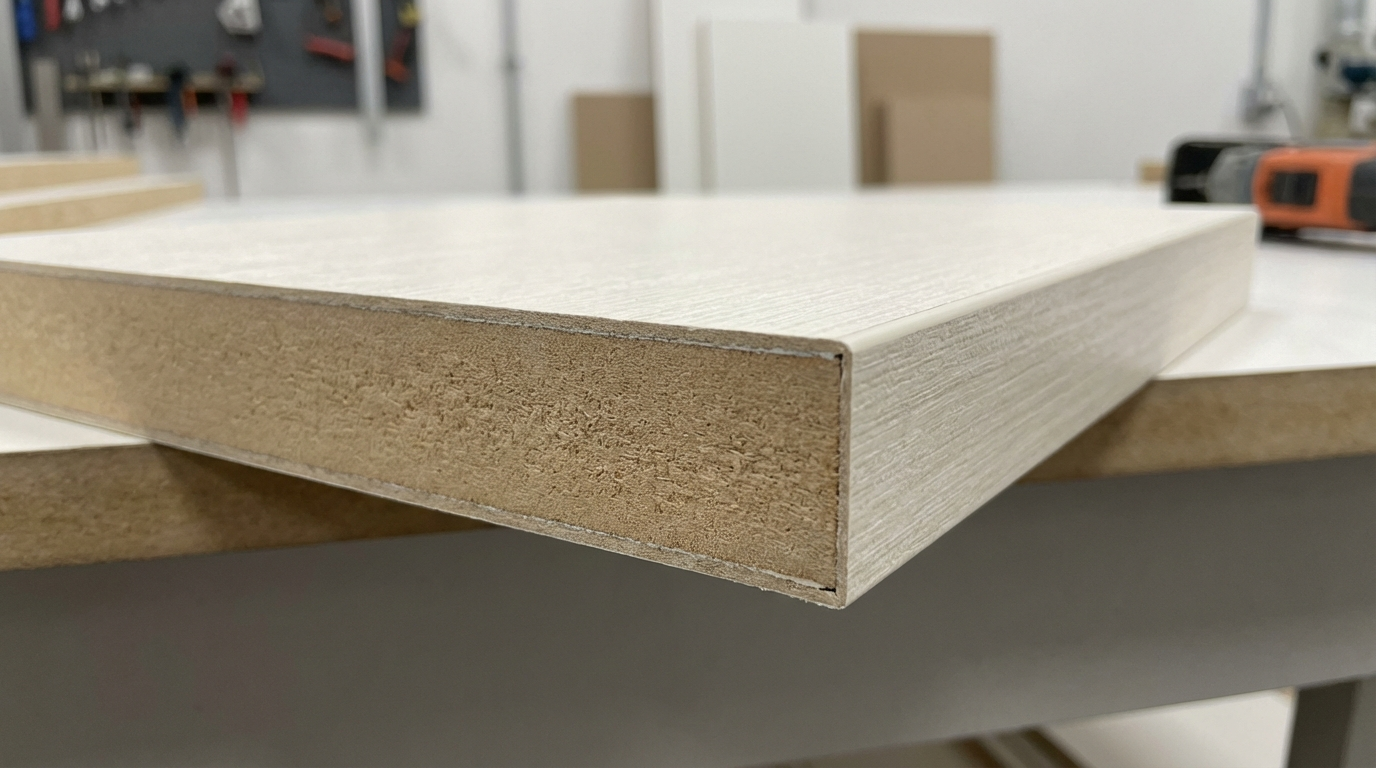
Prelam board—short for pre-laminated board—refers to MDF (Medium Density Fibreboard) or HDF (High Density Fibreboard) panels that come with decorative laminate already bonded to one or both surfaces at the factory. Unlike raw MDF that requires separate lamination at the carpentry site, prelam arrives ready for cutting and edge treatment.
The laminate layer is typically melamine-impregnated decorative paper fused under high pressure and temperature. This creates a surface that resists scratches, stains, and minor abrasion better than paint or PU finishes on raw MDF. The core remains standard MDF unless specifically marked as MR (Moisture Resistant), HDHMR (High Density High Moisture Resistant), or HDF.
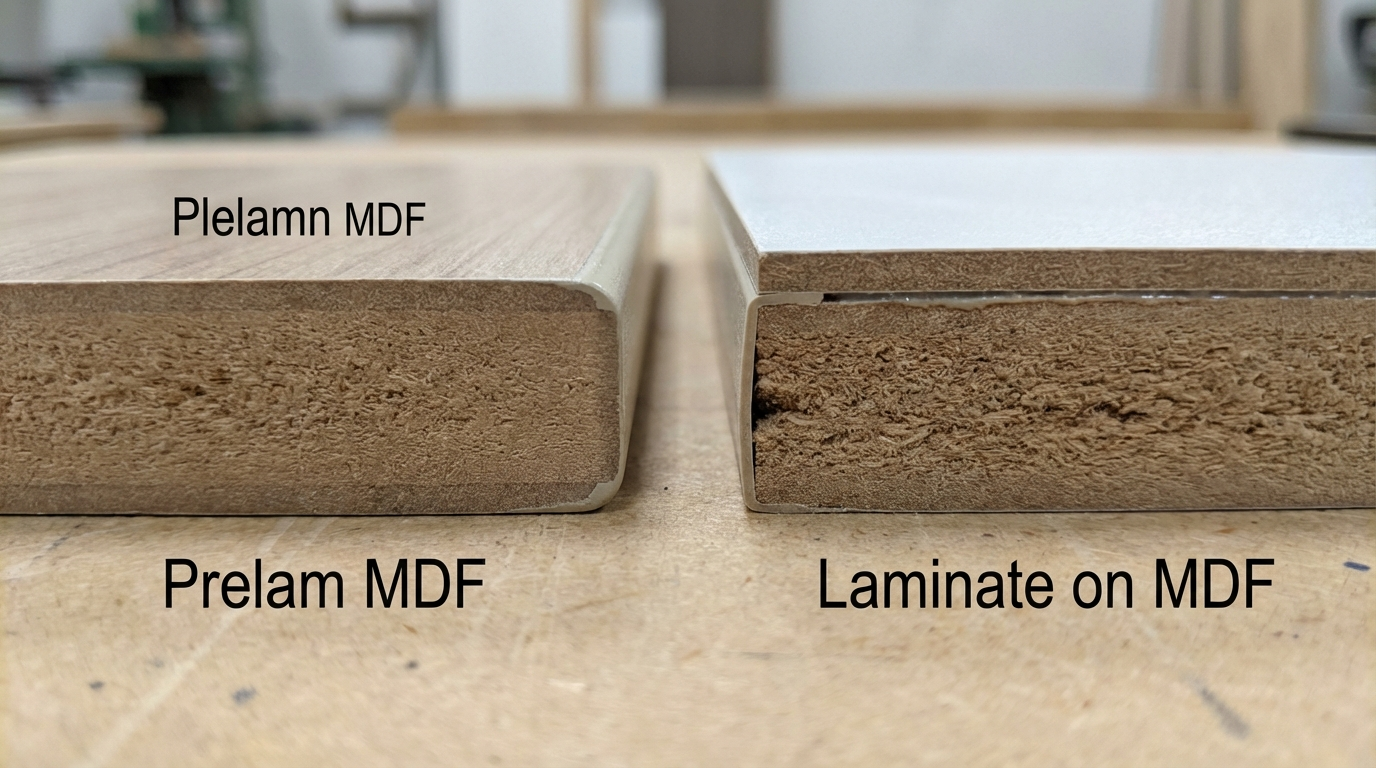
How Does Prelam Differ from Post-Laminated MDF?
Post-lamination means applying laminate sheets on-site using adhesive and pressure after the MDF is cut to size. Prelam is factory-bonded before the board reaches the market. The factory process ensures better adhesion, uniform pressure distribution, and elimination of air bubbles—common issues in site lamination. However, prelam limits you to available colours and textures in the manufacturer's catalogue, while post-lamination allows any laminate brand or design to be applied on raw MDF.
Is Prelam the Same as Pre-Laminated Particle Board?
No. Particle board has a different core structure—made from wood chips and particles rather than wood fibres. Prelam MDF has a denser, smoother core that holds screws better along edges and allows cleaner CNC routing. Prelam particle board exists but is typically used in economy furniture segments where edge screw-holding and routing precision matter less.
Why Prelam Board Matters in Indian Homes and Sites
Indian interior projects face unique challenges that make material choice critical. Monsoon humidity, inconsistent storage conditions at dealer yards, and varying workmanship skills all affect final furniture quality.
Monsoon and Coastal Humidity Risks
Standard prelam MDF absorbs moisture through exposed edges and cut surfaces. In cities like Mumbai, Chennai, Kolkata, and coastal Karnataka, relative humidity routinely exceeds 70-80% for 4-5 months annually. Without proper edge sealing, prelam boards can swell at edges, cause laminate delamination, and develop permanent waviness. MR-grade or HDHMR prelam is essential for these regions, even for bedroom furniture.
Storage and Transport Realities
Many dealers store boards in semi-open godowns where humidity fluctuates. Prelam boards stacked incorrectly or exposed to rain during transport can arrive at your site with pre-existing moisture damage. This damage may not be visible immediately but manifests as edge swelling or laminate bubbling within months of installation. Always inspect boards at the dealer's shop before accepting delivery.
Site Workmanship Variables
Prelam reduces dependency on carpentry skill for lamination—the finish is already done. However, edge banding, cutting precision, and hardware installation still require skilled work. In Indian projects where multiple contractors handle different stages, prelam's factory finish provides consistency that site lamination cannot guarantee.
Price Range and Cost Drivers
Prelam board pricing in India varies significantly based on multiple factors. Understanding these helps you budget accurately and avoid overpaying or underspecifying.
What is the Typical Price Range for Prelam Board in India?
For standard interior-grade prelam MDF in 18mm thickness, expect ranges of ₹45-65 per square foot depending on brand, finish type, and city. MR-grade prelam costs 15-25% more, typically ₹55-80 per square foot. HDHMR prelam, suitable for kitchen and bathroom applications, ranges from ₹70-95 per square foot. Pre-laminated HDF, being denser, costs ₹80-120 per square foot for 18mm thickness. These are indicative ranges—actual prices vary by dealer, quantity, and current market conditions.
Thickness-Wise Price Variation
| Thickness | Standard Prelam MDF (₹/sq ft) | MR-Grade Prelam (₹/sq ft) | HDHMR Prelam (₹/sq ft) |
|---|---|---|---|
| 8mm | 25-35 | 32-42 | 40-55 |
| 12mm | 35-48 | 42-58 | 55-72 |
| 18mm | 45-65 | 55-80 | 70-95 |
| 25mm | 65-85 | 78-100 | 95-125 |
Key Cost Drivers Explained
Density and Grade: Higher density boards cost more but offer better screw-holding and edge stability. MR and HDHMR grades use special resins that add 15-30% to base costs.
Finish Type: Solid colours typically cost less than wood-grain textures. Synchronized textures (where surface texture matches the printed pattern) command premium pricing. High-gloss finishes cost 20-40% more than matte or satin finishes.
Laminate Thickness: Standard prelam uses 0.5-0.8mm laminate. Thicker laminates (1mm+) provide better scratch resistance but increase costs.
Logistics: Tier-2 and Tier-3 cities often see 10-20% higher prices due to transport costs from manufacturing hubs. Coastal cities may have limited stock of moisture-resistant grades.
Wastage Factor: Typical cutting wastage runs 8-15% depending on furniture design complexity. Factor this into your budget calculations.
Sample Budget Calculation: 6-Door Wardrobe
For a standard 8x7 feet wardrobe with 6 shutters, internal shelves, and drawers:
- Estimated prelam consumption: 180-220 sq ft (including wastage)
- Standard 18mm prelam at ₹55/sq ft: ₹9,900-12,100 for boards alone
- Add edge banding, hardware, labour: ₹8,000-15,000
- Total material + basic labour estimate: ₹18,000-27,000
How to Ask for a Quote: Checklist
- Specify exact grade: Interior, MR, or HDHMR
- Mention required thickness for each component
- List finish type: matte, gloss, textured, synchronized
- Confirm if price is per sq ft or per sheet
- Ask about minimum order quantities for specific colours
- Clarify delivery charges and unloading responsibility
- Request wastage recommendations for your design
Two-Minute Comparison: Prelam vs Raw MDF vs Plywood
Choosing between prelam, raw MDF, and plywood depends on your specific application, budget, and site conditions. Each material serves different needs.
| Parameter | Prelam MDF | Raw MDF + Laminate | Commercial Plywood + Laminate |
|---|---|---|---|
| Surface Finish Quality | Factory-consistent | Depends on site skill | Depends on site skill |
| Moisture Resistance | Low (standard), Medium-High (MR/HDHMR) | Low (standard) | Medium-High (BWR grade) |
| Edge Screw Holding | Moderate | Moderate | High |
| CNC Routing Precision | Excellent | Excellent | Good (grain variations) |
| Installation Speed | Fast (no lamination) | Slower (lamination needed) | Slower (lamination needed) |
| Design Flexibility | Limited to catalogue | Any laminate available | Any laminate available |
| Cost (18mm, ₹/sq ft) | 45-95 | 35-50 + laminate cost | 80-140 + laminate cost |
| Best For | Shutters, panels, fast projects | Custom finishes, veneer work | Structural components, wet zones |
When to Choose Based on Conditions
Dry interior zones (bedrooms, living rooms): Standard prelam MDF offers the best value-to-speed ratio.
Moderate humidity (kitchens away from sink): MR-grade prelam or HDHMR prelam works well for shutters and wall units.
High moisture zones (sink cabinets, bathroom vanities): Consider marine plywood or HDHMR with proper edge sealing. Standard prelam fails quickly in these applications.
Custom veneer or designer laminate requirements: Raw MDF + post-lamination gives maximum design flexibility.
Heavy structural loads (bed frames, heavy storage): Plywood outperforms MDF-based options due to superior cross-grain strength.
Practical Use Cases: What Works, What Fails
| Application | Recommended Thickness | Finish Notes | Risk Notes |
|---|---|---|---|
| Wardrobe Shutters | 18mm | Matte or textured for fingerprint resistance | Hinge area chipping if not pre-drilled |
| Kitchen Wall Units | 18mm MR/HDHMR | Gloss for easy cleaning | Steam exposure causes edge swelling |
| Kitchen Base Units | 18mm HDHMR or marine ply | Matte preferred | Water splash damage common |
| TV Unit Back Panels | 8-12mm | Any finish | Low risk application |
| Study Table Tops | 18-25mm | Scratch-resistant matte | Edge damage from daily use |
| Wall Panelling | 8-12mm | Textured or wood-grain | Adhesive failure if walls have moisture |
| Bathroom Vanity | 18mm HDHMR minimum | High-gloss for water resistance | High failure risk even with HDHMR |
| Office Partitions | 12-18mm | Solid colours common | Acoustic performance limited |
| Retail Display Units | 18mm | High-gloss or synchronized | Impact damage from customers |
Common Buyer Mistakes and How to Avoid Them
Understanding typical errors saves money and prevents project delays. These mistakes occur frequently across Indian markets.
Mistake 1: Ignoring Grade Requirements for Humid Areas
Using standard interior-grade prelam in kitchens or coastal cities leads to swelling within 6-12 months. Always specify MR or HDHMR grade for any application involving humidity above 60% consistently.
Mistake 2: Not Inspecting Boards Before Delivery
Prelam boards stored improperly at dealers may have pre-existing damage. Visit the dealer, check for edge swelling, surface scratches, and laminate bubbling before accepting delivery. Reject boards showing these signs.
Mistake 3: Skipping Edge Banding on Visible Edges
Exposed MDF edges absorb moisture and look unfinished. Even in low-humidity areas, edge banding is essential for durability and aesthetics. Budget for edge banding material and labour from the start.
Mistake 4: Over-Relying on Prelam for Structural Components
Prelam MDF works for shutters and panels, not for load-bearing frames. Use plywood or solid wood for carcass frames, especially for heavy wardrobes or overhead cabinets.
Mistake 5: Choosing Finish Based Only on Showroom Lighting
Gloss finishes look premium in showrooms but show fingerprints, scratches, and dust prominently in home lighting. Request samples and test in your actual space lighting before finalizing.
Mistake 6: Assuming All Prelam Is Equal Across Brands
Laminate bond strength, core density, and MR treatment quality vary significantly. Ask dealers about the manufacturing process and check for visible quality differences in core density when examining cut samples.
Mistake 7: Not Accounting for Cutting Wastage
Standard 8x4 feet sheets may not optimize well for your furniture dimensions. Calculate cutting layouts before ordering to minimize wastage. Expect 8-15% wastage for typical furniture projects.
Mistake 8: Ignoring Ventilation Requirements
Enclosed cabinets with prelam on all sides can trap humidity, especially if placed against external walls in monsoon-prone areas. Include ventilation holes or gaps in cabinet backs and bases.
Mistake 9: Using Wrong Hardware for MDF
Standard wood screws don't hold well in MDF edges. Use MDF-specific screws, confirmat fittings, or pre-drill and use dowels with glue for critical joints.
Mistake 10: Delaying Edge Sealing After Cutting
Cut prelam edges absorb moisture within hours in humid conditions. Edge banding or sealing should happen immediately after cutting—not days later when the carpenter "has time."
Failure Modes and Fixes
Even quality prelam fails when conditions or handling go wrong. Understanding failure patterns helps you prevent them or address issues early.
Edge Swelling
Symptom: Edges expand, become soft, and may crumble when touched.
Root Cause: Moisture absorption through unprotected cut edges or prolonged humidity exposure.
Prevention: Apply edge banding immediately after cutting. Use MR/HDHMR grades in humid zones. Ensure cabinets have ventilation.
If Already Happening: Cut away swollen portions and re-edge with proper sealing. If severe, replacement is the only reliable solution.
Laminate Delamination
Symptom: Decorative surface layer peels or bubbles away from the MDF core.
Root Cause: Factory bonding defect, excessive heat exposure, or moisture penetration through edges.
Prevention: Buy from reputable sources. Avoid placing prelam near heat sources like gas stoves or direct sunlight exposure. Seal edges properly.
If Already Happening: Small bubbles can sometimes be re-adhered using heat and pressure. Extensive delamination requires panel replacement.
Surface Scratching
Symptom: Visible scratch marks that expose the base paper layer beneath the melamine.
Root Cause: Using abrasive cleaners, dragging hard objects across surface, or thin laminate layer.
Prevention: Use soft cloths for cleaning. Place felt pads under objects. Choose scratch-resistant finishes for high-use surfaces.
If Already Happening: Minor scratches can be masked with colour-matched touch-up markers. Deep scratches are permanent.
Screw Pull-Out at Hinges
Symptom: Hinges become loose, doors sag, screws no longer grip.
Root Cause: Screws inserted too close to edges, wrong screw type, or repeated stress on MDF's limited edge-holding capacity.
Prevention: Use hinge mounting plates that distribute load. Pre-drill pilot holes. Use longer screws that engage more core material. Consider hinge boring for concealed hinges.
If Already Happening: Fill old holes with wood filler mixed with sawdust, let cure, and re-drill. Alternatively, relocate hinges to fresh material.
Warping and Bowing
Symptom: Flat panels develop curves or twists over time.
Root Cause: Uneven humidity exposure (one side against wall, one exposed), improper storage before installation, or thin panels without adequate support.
Prevention: Store boards flat with support across full surface. Allow boards to acclimatize to site conditions for 48-72 hours before cutting. Use appropriate thickness for span.
If Already Happening: Mild warping may correct if humidity conditions normalize. Severe warping is permanent—replacement needed.
Chipping During Cutting
Symptom: Laminate chips and fragments along cut lines, creating rough, unprofessional edges.
Root Cause: Dull blades, wrong blade type, incorrect feed speed, or cutting with laminate face down.
Prevention: Use sharp, fine-toothed blades designed for laminated boards. Cut with laminate face up for hand tools, face down for table saws with proper blade. Apply masking tape along cut line for extra protection.
If Already Happening: Chipped edges must be covered with edge banding or trimmed further if design allows.
Decision Framework: Choosing the Right Prelam Specification
| Condition | Recommended Specification | What to Verify |
|---|---|---|
| Coastal city or high humidity (Mumbai, Chennai, Kolkata) | HDHMR prelam, 18mm minimum | Ask for MR/HDHMR certification mark on board edge |
| Kitchen shutter near cooking zone | MR-grade minimum, matte finish | Heat resistance rating, edge banding quality |
| Bathroom application | HDHMR or marine plywood preferred | Water immersion test reports if available |
| Budget-constrained dry interior | Standard interior prelam, 18mm | Core density consistency across sheets |
| High scratch risk (kids room, commercial) | Synchronized texture or anti-scratch finish | Request scratch resistance specification |
| Fast project timeline | Stock colours in prelam, avoid custom orders | Dealer inventory levels, delivery timelines |
| CNC-routed decorative panels | 18mm prelam with consistent density | Sample routing test for chipping |
| Heavy load shelving | 25mm prelam with plywood backing, or plywood primary | Deflection testing for span |
Quality Checks You Can Do Without Lab Tests
Before Buying: Visual and Physical Inspection
- Surface uniformity: Run your hand across the laminate surface. Feel for bumps, depressions, or grit trapped under laminate.
- Edge condition: Examine factory edges for swelling, soft spots, or visible moisture damage.
- Core density: Request a cut sample. Dense, uniform core with no voids indicates quality. Visible large particles or gaps suggest inferior core.
- Laminate adhesion: Try to lift the laminate edge with a fingernail at a factory edge. It should not separate easily.
- Stack inspection: Check multiple boards from the stack, not just the top one. Damage often hides in the middle of stacks.
- Colour consistency: Compare boards from the same batch for colour matching. Variations indicate quality control issues.
After Cutting: Workmanship Indicators
- Cut edge quality: Clean cuts with minimal chipping indicate proper blade and technique. Excessive chipping suggests blade issues or wrong cutting approach.
- Core exposure: Freshly cut edges should show dense, uniform material. Voids or large particles visible in the core indicate quality issues.
- Moisture absorption rate: In humid conditions, place a small water droplet on fresh-cut edge. Rapid absorption (spreading within seconds) indicates poor moisture resistance.
After Installation: Ongoing Checks
- Edge banding adhesion: After 24 hours, try to peel edge banding at corners. Properly bonded banding should not lift.
- Door alignment: Check that doors hang level and maintain alignment over first few weeks. Sagging indicates hardware issues or material problems.
- Surface cleaning: Wipe with damp cloth. Laminate should clean easily without water absorption or surface damage.
- Joint gaps: Monitor joints over first monsoon season. Expansion gaps opening or closing excessively indicate moisture-related issues.
Red Flags to Watch For
- Dealer reluctant to show cut samples or allow inspection
- Significantly lower prices than market average without clear reason
- Boards stored outdoors or in visibly humid conditions
- No grade marking visible on board edges
- Inconsistent board thickness within the same order
Persona-Specific Guidance
For Homeowners: Durability and Maintenance
Do:
- Wipe spills immediately—don't let liquids sit on prelam surfaces
- Use soft, damp cloths for regular cleaning
- Install ventilation grilles in enclosed cabinets
- Keep prelam furniture away from direct sunlight exposure
- Address small scratches with colour-matched touch-up pens before they worsen
Don't:
- Use abrasive scrubbers or harsh chemical cleaners
- Place hot vessels directly on prelam surfaces
- Ignore early signs of edge swelling—it worsens quickly
- Store wet items in prelam cabinets without air circulation
- Attempt repairs with general-purpose adhesives—they rarely match factory bonding
For Carpenters: Cutting and Installation Tips
Cutting:
- Use 80-100 tooth carbide-tipped blades for clean cuts
- Score the laminate surface with utility knife along cut line before machine cutting
- Apply masking tape along cut lines to reduce chipping
- Support long boards properly to prevent vibration during cutting
- Cut with good-face up for circular saws, good-face down for table saws
Edge Preparation:
- Sand cut edges lightly before applying edge banding
- Remove dust completely before adhesive application
- Apply edge banding within hours of cutting in humid conditions
- Use proper edge banding adhesives—not general wood glue
Fastening:
- Pre-drill all screw holes—MDF splits easily
- Keep screws minimum 25mm from edges
- Use confirmat screws or MDF-specific fasteners
- Reinforce hinge areas with hardwood blocks or metal plates for heavy doors
Handling:
- Carry boards vertically with two people—horizontal carry causes bowing
- Store flat with full support underneath
- Allow 48-72 hours acclimatization before cutting and installation
- Protect surfaces from site dust and debris during installation
For Architects and Designers: Specification Guidance
- Specify exact grade (Interior/MR/HDHMR) in drawings and BOQs
- Include thickness requirements for each application type
- Note edge treatment requirements in specifications
- For wet zones, specify plywood carcass with prelam shutters rather than full prelam construction
- Include ventilation requirements in cabinet details for humid climates
- Specify finish type considering maintenance expectations and usage patterns
- Request shop drawings showing cutting layouts to optimize material usage
- Include mock-up requirements for large projects to verify colour and quality
For OEM and Modular Furniture Manufacturers: Production Considerations
- Establish incoming inspection protocols for every batch—colour consistency, thickness tolerance, surface defects
- Maintain controlled humidity storage (50-60% RH) for inventory
- Create cutting optimization templates for common furniture sizes to minimize wastage
- Document edge banding adhesion test results for quality records
- Standardize on specific grades and sources to ensure consistency across production batches
- Include moisture exposure warnings in customer documentation
- Train installation teams on proper handling and fastening techniques
- Establish clear warranty terms that exclude moisture-related damage from improper use
FAQs
What is the full form of prelam board?
Prelam is short for "pre-laminated." The full technical term is pre-laminated medium density fibreboard (MDF) or pre-laminated high density fibreboard (HDF), depending on the core material. The "pre" indicates that the decorative laminate surface is factory-applied before the board reaches the market, unlike post-lamination where laminate sheets are applied at the carpentry site. This factory bonding process uses high pressure and temperature to create a more durable and consistent bond than site lamination typically achieves.
Can prelam board be used in kitchens?
Yes, but with important qualifications. Standard interior-grade prelam should not be used in kitchens due to humidity from cooking and water splash risks. MR-grade (Moisture Resistant) prelam works for wall cabinets and areas away from direct water contact. For base units near sinks or areas with regular water exposure, HDHMR-grade prelam or marine plywood with laminate is recommended. Even with proper grades, edge sealing is critical—exposed edges remain vulnerable to moisture penetration. Kitchen shutters near cooking zones also face heat exposure, so maintaining distance from gas flames is essential.
How long does prelam furniture typically last?
In dry interior applications with proper installation and normal use, prelam furniture typically lasts 8-15 years before showing significant wear. Lifespan depends heavily on grade selection, edge treatment quality, and environmental conditions. In high-humidity areas without proper grade selection, failure can occur within 2-3 years. Kitchen and bathroom applications see shorter lifespans due to moisture and heat stress. Quality of hardware, particularly hinges, often limits practical lifespan before the board itself fails. Regular maintenance and prompt attention to edge damage extends usable life significantly.
Is prelam board waterproof?
No prelam board is truly waterproof. Even HDHMR-grade prelam is moisture-resistant, not waterproof—it resists moisture penetration better and longer than standard grades but will still fail with prolonged water exposure. The laminate surface provides some water resistance, but cut edges and any surface damage expose the MDF core, which absorbs water readily. For applications requiring waterproof performance, marine-grade plywood or PVC boards are more appropriate choices. When using prelam in moisture-prone areas, proper edge sealing and ventilation are essential to maximize lifespan.
What is the difference between prelam MDF and prelam particle board?
The core material differs significantly. Prelam MDF uses wood fibres compressed uniformly, creating a dense, smooth core with consistent density throughout. Prelam particle board uses larger wood particles and chips, resulting in a less uniform core with visible particle distribution. MDF holds screws better at edges, allows cleaner CNC routing and cutting, and has better surface smoothness. Particle board is typically cheaper but has inferior edge-screw holding, tends to chip more during cutting, and offers lower load-bearing capacity. For furniture requiring precision work or edge fastening, prelam MDF is the better choice.
Can prelam board be painted or refinished?
Painting over prelam is technically possible but not recommended for several reasons. The melamine laminate surface is designed to resist adhesion, making paint adherence difficult without extensive surface preparation including sanding and specialized primers. Even with proper preparation, paint adhesion may be inconsistent and durability poor compared to the original laminate finish. The primary advantage of prelam—ready-to-use factory finish—is negated when painting over it. If you need a painted finish, starting with raw MDF and painting it properly yields better results than attempting to paint over prelam.
What edge banding works best with prelam?
PVC edge banding in 0.8-2mm thickness is most commonly used with prelam. Thicker edge banding (1.5-2mm) provides better durability and impact resistance for high-use edges like wardrobe door edges. ABS edge banding is an alternative with similar performance characteristics and better environmental profile. Edge banding should match the prelam surface colour and texture for visual consistency—most manufacturers offer coordinated edge banding for their prelam finishes. Application using hot-melt adhesive and proper edge banding machines provides best results. Manual application with contact adhesive is possible but typically yields inferior adhesion.
How do I identify MR-grade prelam from standard prelam?
Manufacturers typically mark MR-grade boards with stamps or labels on the board edge indicating the grade designation. Look for markings like "MR," "Moisture Resistant," "HDHMR," or similar indicators. Some manufacturers use colour-coded core treatments—green-tinted core often indicates moisture resistance, though this varies by manufacturer. Without visible markings, reliable identification is difficult without destructive testing. Always purchase from dealers who can provide documentation of grade specifications and buy boards with visible grade markings. Suspicious of unmarked boards being sold as MR-grade? They may be standard boards being misrepresented.
What thickness should I choose for wardrobe shutters?
18mm is the standard and recommended thickness for wardrobe shutters. This thickness provides adequate rigidity to prevent warping or bowing across typical wardrobe door spans (usually 450-600mm wide, 1800-2100mm tall). Thinner boards (12mm) may work for very small doors but risk warping over time. Wider doors (beyond 600mm) may benefit from 25mm thickness or require additional internal framing. For sliding wardrobe shutters, which experience different stress patterns, 18mm remains standard. The weight of 18mm prelam also suits standard wardrobe hinges—thinner boards may need different hinge specifications.
Can CNC routing be done on prelam board?
Yes, CNC routing works well on prelam, and this is one of its advantages over plywood. The uniform density of MDF core produces clean, consistent routing results without grain-related variations. However, routing exposes the raw MDF core, which requires sealing or edge treatment in humid conditions. For decorative CNC panels, the routed patterns are often painted to seal exposed core and add contrast against the laminated surface. Use sharp, clean bits appropriate for MDF—dull bits cause excessive heat buildup and can damage the laminate surface near routed areas. Feed rates should be optimized to prevent burning.
How should prelam boards be stored on site before installation?
Store boards flat on a level surface with full support underneath—never lean boards against walls for extended periods as this causes bowing. Keep boards away from moisture sources, direct sunlight, and heat. In humid climates, store in covered, ventilated areas rather than enclosed spaces that trap humidity. Stack boards with protective material between layers to prevent surface scratches. Allow 48-72 hours minimum for boards to acclimatize to site humidity conditions before cutting—this reduces post-installation warping. Cover stacks with breathable material, not plastic sheets that trap condensation.
What is the weight of standard prelam board?
An 18mm standard prelam MDF sheet measuring 8x4 feet (2440x1220mm) typically weighs 38-45 kg depending on core density. Higher density boards and HDF-based prelam are heavier. MR-grade and HDHMR boards may weigh slightly more due to additional resin content. This weight affects handling requirements—two-person lifting is recommended for full sheets, and adequate structural support is needed for heavy overhead installations. Weight also impacts shipping costs and should be considered in project logistics planning. Compared to similar-sized plywood sheets (typically 25-35 kg for 18mm), prelam MDF is noticeably heavier.
Disclaimer: This content is provided for general informational purposes based on industry practices and publicly available information. Product specifications, standards, prices, and availability may vary by manufacturer, region, and time. Readers should independently verify details with manufacturers, dealers, or qualified professionals before making purchase or construction decisions.Want Plywood Suggestions?
Share a few details and a VIR MDF specialist will suggest suitable brands and connect you to responsive dealers.