Door Laminate Sheet – Complete Guide for Indian Buyers
Research-backed door laminate sheet breakdown with pros/cons, tables, and a clear decision checklist for Indian buyers and carpenters.
Note: This is independent informational content and is not affiliated with any manufacturer.
Quick Decision Summary
Best answer in one line: Door laminate sheets offer a cost-effective, durable surface finish for wooden doors, but success depends entirely on choosing the right thickness, finish type, and edge treatment for your specific door location and climate zone.
If you're in a hurry: For interior bedroom or living room doors in dry zones, standard 0.8mm decorative laminates work well. For bathroom doors, kitchen entrances, or main doors exposed to weather, opt for 1mm thickness with moisture-resistant adhesive and sealed edges. Always confirm the substrate quality (plywood or MDF) before selecting your laminate, as a weak core will cause premature failure regardless of laminate quality.
- Choose door laminate sheets if: You need an affordable decorative finish, want variety in patterns and textures, need scratch and stain resistance, or are working with standard-sized flush doors.
- Avoid door laminate sheets if: The door faces direct rain exposure, you cannot ensure proper edge sealing, the substrate is already damaged or warped, or you need a premium solid wood appearance without any visible seams.
What Door Laminate Sheets Actually Are
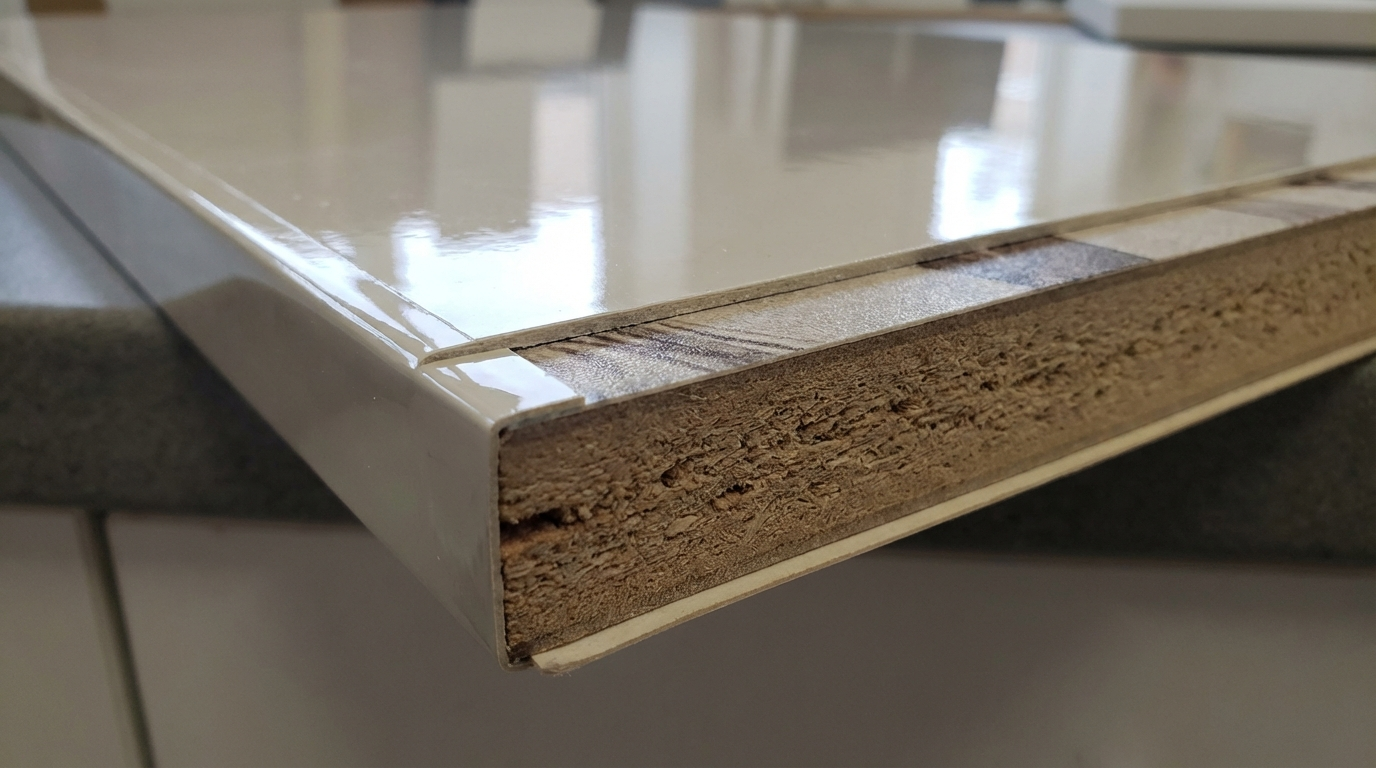
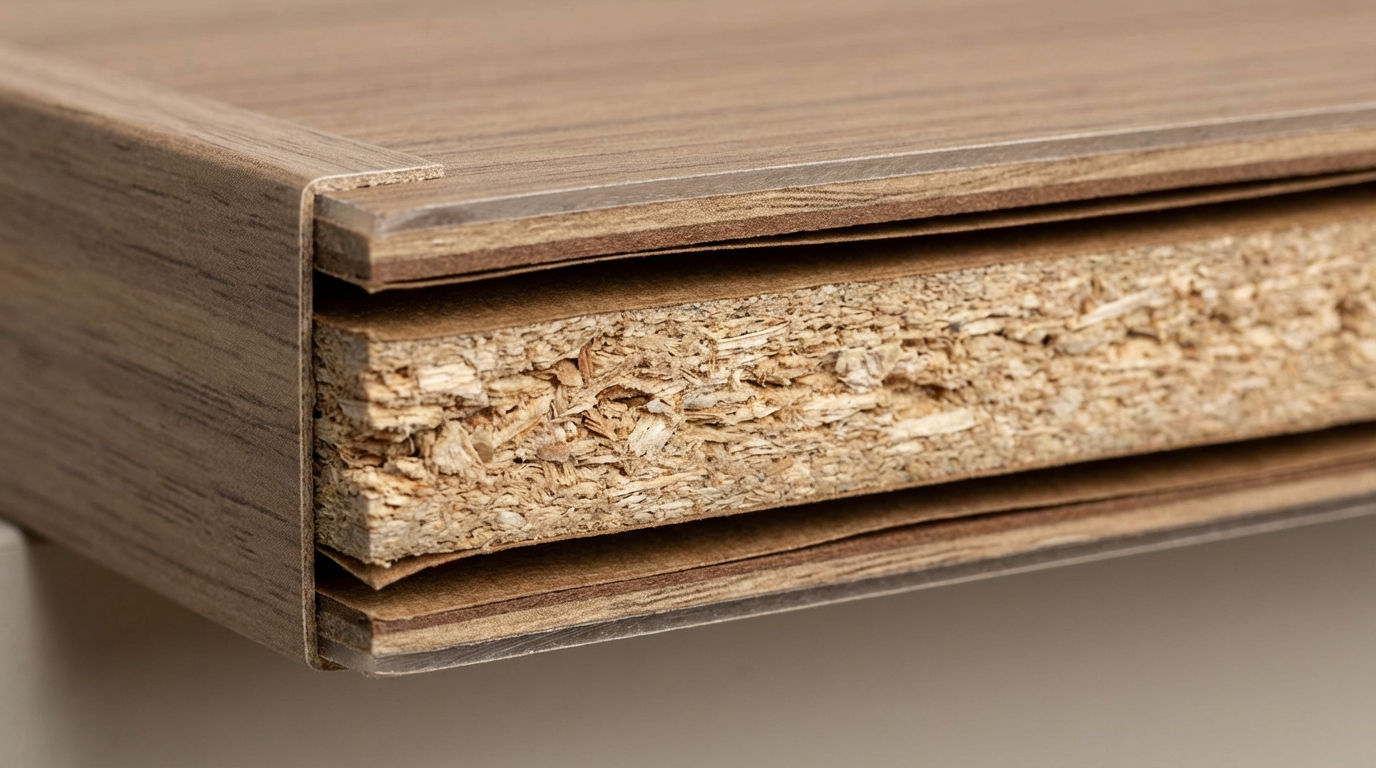
Door laminate sheets are thin decorative surfacing materials manufactured by bonding multiple layers of kraft paper impregnated with phenolic resins, topped with a decorative paper layer and a protective melamine overlay. This composite structure is pressed under high heat and pressure to create sheets typically ranging from 0.6mm to 1.5mm thickness for door applications.
Unlike pre-laminated boards where the laminate comes factory-bonded to MDF or particleboard, door laminate sheets are separate products that carpenters apply on-site using contact adhesive or PVA-based glue. This distinction matters significantly because on-site application introduces variables like adhesive quality, pressing technique, and edge finishing that factory processes control more consistently.
How are door laminate sheets different from door skins?
Door laminate sheets and door skins serve similar purposes but differ in thickness and application method. Laminate sheets are thinner (0.6mm to 1.5mm), require adhesive application, and can cover existing door surfaces during renovation. Door skins are thicker panels (typically 2.5mm to 4mm) designed to be pressed onto door frames during manufacturing or as complete face replacements.
For renovation projects where you want to refresh existing doors without replacing them entirely, laminate sheets offer a practical solution. For new door construction, especially hollow-core flush doors, door skins provide better structural contribution and are applied during the door assembly process rather than as a surface finish.
Why Door Laminate Selection Matters in Indian Conditions
Indian homes face unique challenges that make door laminate selection more critical than in temperate climates. The combination of monsoon humidity, extreme summer heat, and regional variations in moisture levels creates conditions that can cause laminate failure if specifications are not matched to the environment.
Monsoon and Coastal Humidity Impact
During monsoon months, relative humidity in many Indian cities exceeds 80-90% for extended periods. Coastal areas like Mumbai, Chennai, and Kolkata experience this humidity year-round. This moisture penetrates through any unsealed edges, causing the substrate to swell unevenly. When the dry season returns, the substrate shrinks, but the laminate cannot shrink at the same rate—resulting in bubbling, edge lifting, and eventual delamination.
Bathroom doors and kitchen entrance doors face the worst conditions because they experience humidity spikes from cooking steam and bathing combined with ambient monsoon moisture. Main doors in buildings without covered corridors face direct rain splash during monsoon winds, creating localized moisture damage along the bottom edge.
Storage and Transport Realities
Laminate sheets stored improperly at dealer warehouses or construction sites can absorb moisture before installation. Unlike factory-sealed products, loose laminate sheets are vulnerable during the supply chain. Sheets stored leaning against walls in damp godowns may develop subtle warping that only becomes visible after application. Always inspect sheets for flatness before accepting delivery.
Types of Door Laminate Sheets Available in India
Understanding the different types helps you match the right product to your door location and usage pattern. The Indian market offers several categories, each with distinct characteristics and price points.
High-Pressure Laminates (HPL) for Doors
HPL sheets are manufactured at pressures of 70-100 bar and temperatures around 140-150°C. This intense processing creates a denser, harder surface with superior scratch resistance and durability. For doors that receive heavy use—main entrance doors, office cabin doors, or doors in commercial establishments—HPL provides better long-term performance despite higher initial cost.
HPL thickness for doors typically ranges from 0.8mm to 1.5mm. The 1mm thickness offers a good balance between durability and workability for most residential applications. Thicker HPL becomes more challenging to wrap around edges smoothly.
Low-Pressure Laminates (LPL) for Doors
LPL is manufactured at lower pressures (20-30 bar) and is generally thinner. While more affordable, LPL offers reduced scratch and impact resistance compared to HPL. For interior doors in bedrooms or guest rooms that see moderate use, LPL can be a cost-effective choice. However, avoid LPL for main doors, bathroom doors, or any door in high-traffic areas.
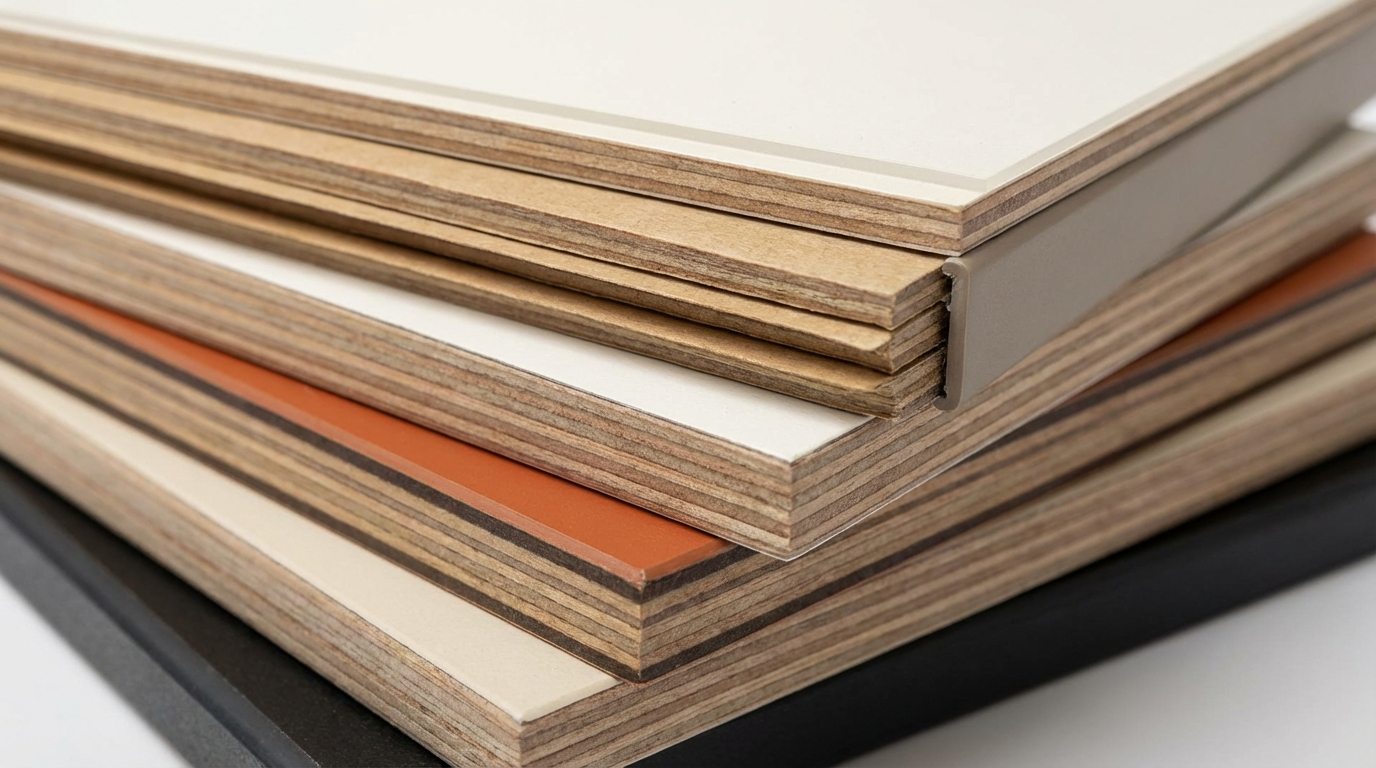
Decorative Laminates by Finish Type
The finish type affects both aesthetics and maintenance requirements:
- Matte finish: Conceals fingerprints and minor scratches well; easier to maintain in family homes with children.
- High-gloss finish: Creates a premium look but shows fingerprints, smudges, and scratches more readily; requires regular cleaning.
- Textured/embossed finish: Mimics wood grain or leather; hides minor surface imperfections but can trap dust in grooves.
- Suede/soft-touch finish: Offers a distinctive tactile feel; requires careful cleaning to avoid permanent marks from oils.
Price Range and Cost Drivers
Door laminate sheet prices in India vary significantly based on several factors. Understanding these drivers helps you budget accurately and avoid overpaying or under-specifying.
What determines door laminate sheet price per square foot?
The price per square foot for door laminate sheets typically ranges from ₹55 to ₹350 depending on type and finish. Standard matte-finish decorative laminates start around ₹55-95 per square foot. High-gloss laminates range from ₹70-120 per square foot. Textured, metallic, or specialized finishes like anti-fingerprint or antibacterial laminates can reach ₹150-350 per square foot.
Key cost drivers include:
- Thickness: 0.8mm costs less than 1mm or 1.5mm variants of the same design.
- Finish complexity: Digital prints, synchronized textures, and specialty coatings add cost.
- Brand positioning: Established manufacturers price higher for perceived quality assurance.
- City and logistics: Prices in smaller cities may be higher due to transport costs; bulk buying reduces per-unit costs.
- Wastage factor: Standard sheet sizes (8x4 feet) may result in 10-20% wastage depending on door dimensions.
Budget Estimate for a Standard Door
For a standard interior flush door measuring 7 feet by 3 feet (21 square feet of coverage including both faces and edges), using mid-range decorative laminate at ₹80 per square foot:
| Cost Component | Estimated Amount |
|---|---|
| Laminate sheets (with 15% wastage) | ₹1,900 - ₹2,100 |
| Adhesive (contact cement or PVA) | ₹200 - ₹400 |
| Edge banding material | ₹100 - ₹200 |
| Labour (application and finishing) | ₹400 - ₹800 |
| Total per door | ₹2,600 - ₹3,500 |
This estimate assumes good substrate condition. If the existing door requires surface preparation, filling, or sanding, add ₹300-600 for materials and labour.
Practical Use Cases: What Works and What Fails
Not every door location suits the same laminate specification. This table summarizes recommendations based on real-world performance patterns in Indian homes.
| Door Location | Recommended Thickness | Finish Notes | Risk Factors |
|---|---|---|---|
| Interior bedroom doors | 0.8mm | Matte or light texture works well | Low risk; standard installation sufficient |
| Bathroom doors (attached) | 1mm minimum | Matte preferred; avoid high gloss | High moisture; ensure sealed edges and bottom gap |
| Kitchen entrance doors | 1mm | Anti-fingerprint or matte finish | Grease exposure; frequent cleaning needed |
| Main entrance (covered) | 1mm to 1.5mm | Texture or wood grain for durability | High traffic; scratch and impact risk |
| Main entrance (exposed) | 1.5mm HPL or alternatives | Consider PVC or veneer instead | Rain splash, UV exposure; laminate may not be ideal |
| Pooja room doors | 0.8mm | Decorative patterns available | Oil lamp residue; needs regular gentle cleaning |
| Children's room doors | 1mm | Matte finish hides scratches | Impact damage; consider reinforced core substrate |
| Office cabin doors | 1mm | Neutral solid colors or subtle textures | Frequent use; check hinge quality alongside laminate |
Decision Framework: Matching Conditions to Specifications
Use this framework to select the right door laminate configuration based on your specific conditions rather than defaulting to generic recommendations.
| Condition | Recommended Specification | What to Verify |
|---|---|---|
| Wet zone (bathroom/utility) | 1mm HPL + waterproof adhesive + sealed edges | Confirm adhesive is moisture-resistant; check edge banding is continuous |
| Coastal city installation | 1mm minimum + marine-grade adhesive + regular edge inspection | Ask for adhesive specifications; plan annual edge maintenance |
| Heavy daily use (5+ openings/hour) | 1mm+ thickness + reinforced hinge zones on substrate | Ensure substrate is solid (not hollow-core with thin faces) |
| Tight budget priority | 0.8mm LPL for dry interior doors only | Do not compromise on bathroom or kitchen doors |
| Fast project timeline | Pre-laminated door shutters instead of on-site application | Verify factory edge finishing quality before accepting |
| High scratch risk (pets/children) | Textured HPL with higher abrasion rating | Request abrasion cycle count if available; test with fingernail |
| Premium appearance needed | Synchronized texture laminate or consider veneer | View full sheet sample; catalogue images may differ from actual product |
Common Buyer Mistakes and How to Avoid Them
These mistakes occur repeatedly in Indian door laminate projects. Learning from others' errors saves money and frustration.
Mistake 1: Ignoring Substrate Condition
Problem: Applying premium laminate over a warped, moisture-damaged, or poor-quality substrate. The laminate cannot correct underlying defects and will fail prematurely.
Prevention: Inspect the door for flatness using a straight edge before ordering laminate. If warping exceeds 3mm across the door width, consider replacing the door rather than re-laminating.
Mistake 2: Selecting Based on Catalogue Images Alone
Problem: Printed catalogues and digital images cannot accurately represent texture, sheen level, or color accuracy. The installed result often disappoints.
Prevention: Always request physical samples of your shortlisted designs. View samples under the lighting conditions of the actual installation location.
Mistake 3: Using Generic Adhesive
Problem: Using cheap contact cement or inappropriate adhesive leads to bubbling and edge lifting, especially in humid conditions.
Prevention: Invest in quality laminate-specific adhesive. For bathroom and kitchen doors, specify moisture-resistant adhesive variants even if they cost more.
Mistake 4: Neglecting Edge Treatment
Problem: Leaving laminate edges exposed or poorly finished allows moisture entry—the primary cause of door laminate failure in Indian homes.
Prevention: Budget for proper edge banding. Ensure the carpenter applies edge band to all four edges, not just the visible sides.
Mistake 5: Choosing High Gloss for High-Traffic Doors
Problem: High-gloss finishes look premium in showrooms but show every fingerprint, scratch, and smudge in daily use.
Prevention: Reserve high-gloss finishes for low-touch surfaces. For doors, matte or textured finishes maintain appearance better over time.
Mistake 6: Not Accounting for Wastage
Problem: Ordering exactly the calculated square footage results in shortage. Standard sheet sizes rarely match door dimensions perfectly.
Prevention: Add 15-20% wastage allowance to your order. Better to have slight surplus than to delay the project sourcing a matching batch.
Mistake 7: Ignoring Grain Direction
Problem: For wood-grain pattern laminates, inconsistent grain direction between the two door faces looks unprofessional.
Prevention: Plan the cutting layout to ensure grain runs in the same direction on both faces. Discuss this explicitly with the carpenter before cutting begins.
Mistake 8: Skipping Acclimatization
Problem: Installing laminate sheets immediately after delivery, especially if sheets were stored in different humidity conditions, can cause post-installation warping.
Prevention: Store laminate sheets flat at the installation site for 48-72 hours before application to allow moisture equilibration.
Failure Modes and Fixes
Understanding how door laminates fail helps you prevent problems and address them early if they occur.
Edge Lifting and Peeling
Symptom: Laminate edge separates from substrate, starting small and progressively worsening.
Root cause: Moisture entry through unsealed edges; inadequate adhesive at edges; poor edge banding application.
Prevention: Apply edge band before face laminate; use sufficient adhesive at perimeter; seal any gaps with appropriate sealant.
If already happening: Clean the separated area, apply fresh adhesive, press firmly with weights for 24 hours, then seal the edge properly.
Bubbling in Center Areas
Symptom: Raised bubbles or blisters appear on the laminate surface away from edges.
Root cause: Air trapped during application; adhesive applied unevenly; laminate not pressed adequately during bonding.
Prevention: Apply adhesive in thin, even coats; use roller or brush to remove air pockets; apply consistent pressure during bonding.
If already happening: Small bubbles can sometimes be flattened by heating gently with a heat gun and pressing immediately. Large bubbles may require cutting, re-gluing, and accepting a visible repair line.
Surface Scratching and Scuffing
Symptom: Visible scratch marks, especially on high-gloss surfaces; dulling of finish in high-contact areas.
Root cause: Laminate grade insufficient for use intensity; abrasive cleaning methods; contact with sharp objects.
Prevention: Select appropriate laminate grade; use soft cloths for cleaning; install door stoppers to prevent wall contact.
If already happening: Minor scratches on matte surfaces may be less visible; deep scratches on gloss surfaces typically require re-laminating that panel.
Color Fading Near Windows
Symptom: Laminate color appears washed out or different from protected areas, particularly on south-facing doors.
Root cause: UV exposure degrading pigments in decorative layer; lower-grade laminates have less UV stability.
Prevention: For doors receiving significant sunlight, specify UV-resistant laminate variants; consider window films to reduce UV transmission.
If already happening: Fading is irreversible; replacement is the only solution for severely faded areas.
Laminate Cracking at Hinge Points
Symptom: Hairline cracks or chips appearing around hinge screw locations.
Root cause: Stress concentration from door weight and movement; screws over-tightened; substrate weakness at hinge zone.
Prevention: Pre-drill hinge holes carefully; do not over-tighten screws; consider reinforcing hinge zones on substrate before laminating.
If already happening: Carefully apply matching laminate touch-up if available; for severe cracking, the hinge-side strip may need re-laminating.
Delamination After Water Exposure
Symptom: Large areas of laminate separating from substrate, often after flooding or prolonged water contact.
Root cause: Adhesive failure due to water ingress; substrate swelling pushing laminate off.
Prevention: Use waterproof adhesive for wet-zone doors; ensure no standing water contacts door bottom; maintain adequate floor clearance.
If already happening: If substrate is swollen, the door may need replacement rather than repair. Minor delamination can be re-glued after thorough drying.
Quality Checks You Can Do Without Lab Tests
You don't need laboratory equipment to assess door laminate quality. These practical checks help you make informed decisions at the dealer, during installation, and after completion.
Before Buying: At the Dealer or Warehouse
- Flatness check: Lay the sheet on a flat surface. Any warping visible without pressing indicates storage damage or manufacturing defect.
- Edge inspection: Examine all four edges of the sheet for chips, cracks, or delamination. Damaged edges will create problems during installation.
- Surface consistency: Look across the sheet surface at a low angle under good lighting. Inconsistent sheen or visible defects suggest quality issues.
- Batch matching: If ordering multiple sheets, confirm they are from the same batch. Different batches may have slight color variations.
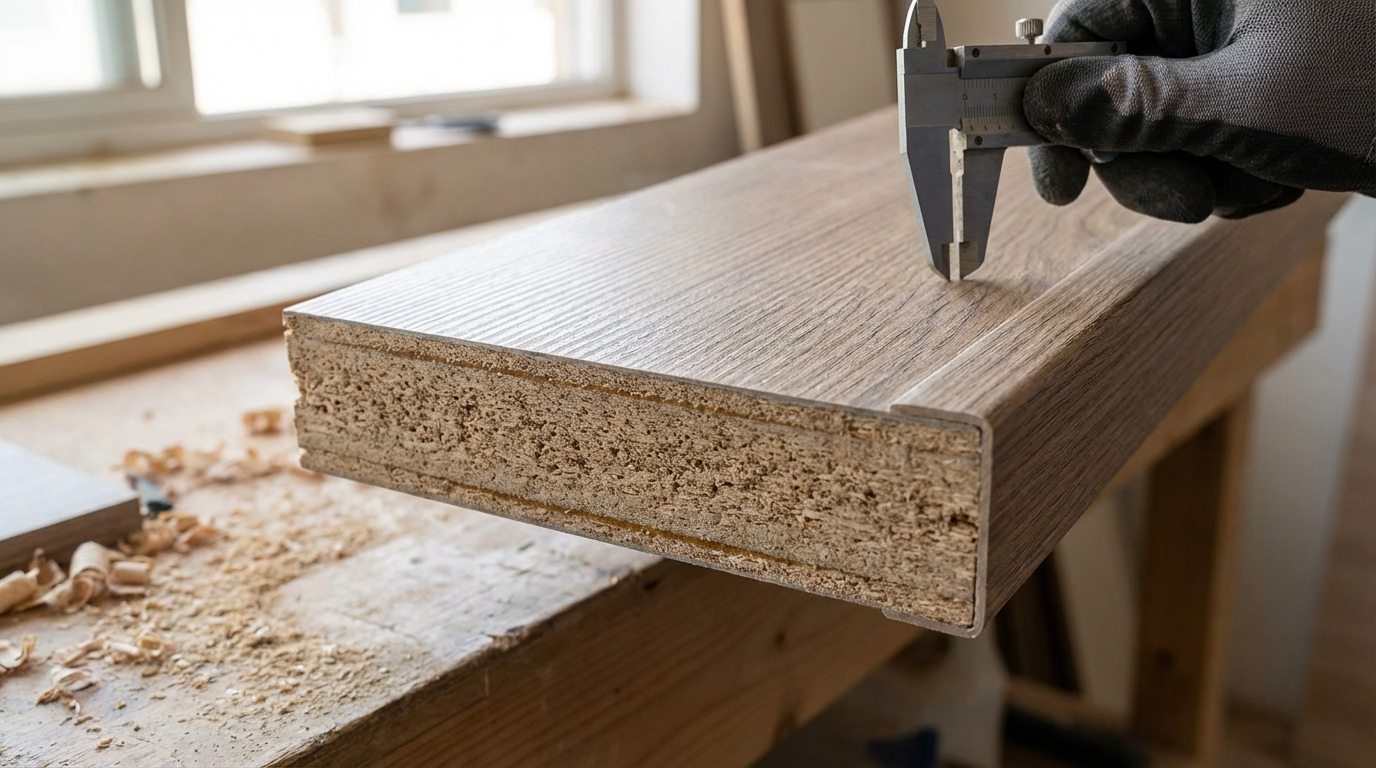
- Thickness verification: Use a vernier caliper if available, or compare sample thickness to specification. Significant variation indicates quality control issues.
How can you tell if a laminate sheet is good quality?
A good quality laminate sheet has consistent thickness across its entire surface, perfectly flat storage, no edge damage, uniform color and pattern, and a firmly bonded decorative layer. Tap the surface lightly—it should feel solid and dense, not hollow. Attempt to flex a corner gently; high-quality HPL will resist bending more than thin or low-quality alternatives. The backside should be uniformly textured for adhesive bonding, not smooth or glossy.
After Cutting: During Carpenter's Work
- Clean cut edges: A sharp blade on properly set cutting equipment produces clean edges without chipping. Excessive chipping indicates dull blades or incorrect speed.
- No delamination at cuts: The decorative layer should remain bonded to the core after cutting. Separation at cut edges signals poor laminate quality or incorrect cutting technique.
- Grain alignment: Verify grain direction matches between pieces before application. Correcting after gluing is impossible.
After Installation: Final Inspection
- Bond integrity: Press firmly across the entire surface. Any hollow sounds or springiness indicates incomplete adhesion.
- Edge sealing: Run your finger along all edges. There should be no gaps, lifting, or exposed substrate.
- Surface cleanliness: Wipe with a clean dry cloth. Adhesive residue should be completely removed during finishing.
- Pattern alignment: For wood-grain or patterned laminates, check that patterns align acceptably between adjacent surfaces.
- Hardware fit: Handles and locks should be installed without cracking or chipping the surrounding laminate.
Tips for Different User Types
For Homeowners: Daily Use and Maintenance
Do:
- Clean laminate doors with a soft damp cloth followed by dry wiping.
- Use mild soap solution for stubborn marks; avoid harsh chemicals.
- Install door stoppers to prevent handles hitting walls.
- Address any edge lifting immediately before it spreads.
- Maintain consistent indoor humidity levels where possible (air conditioning helps).
Don't:
- Use abrasive scrubbers or steel wool on laminate surfaces.
- Allow water to pool at the door bottom, especially bathroom doors.
- Hang heavy items on laminated doors without considering substrate strength.
- Ignore early signs of edge damage—small problems become major failures.
For Carpenters: Installation Best Practices
- Surface preparation: Ensure the substrate is clean, dry, flat, and lightly sanded for adhesive grip. Remove any existing finish that may prevent bonding.
- Adhesive application: Apply even coats to both surfaces. Allow proper tack time before bringing surfaces together—rushing causes bubbles.
- Edge sequence: Apply edge banding before face laminate for better moisture protection. The face laminate then covers the edge band ends.
- Hinge zone handling: Mark hinge locations before laminating. Consider leaving hinge area unlaminated or reinforcing substrate at those points.
- Hardware installation: Use sharp drill bits at appropriate speeds. Dull bits cause chipping. Apply masking tape over drilling locations to reduce chip-out.
- Waste management: Plan cutting layout to minimize waste. Keep offcuts organized—they may be useful for edge banding or small repairs.
For Architects and Designers: Specification Guidance
- Specify thickness and type: Don't leave laminate specification vague. Indicate HPL vs LPL, exact thickness, and required finish type.
- Wet zone differentiation: Call out bathroom and kitchen doors separately with moisture-resistant adhesive requirements.
- Sample approval process: Include a sample approval step before bulk ordering. This prevents disputes about color and texture expectations.
- Edge detail drawings: Provide clear details for edge treatment. Ambiguity leads to inconsistent execution across doors.
- Coordination with hardware: Ensure specified door thickness after lamination accommodates hardware requirements. Laminate adds 1.6-3mm to door thickness.
For OEM and Modular Manufacturers: Quality Control
- Incoming inspection: Check every batch for flatness, edge condition, and color consistency before accepting delivery.
- Controlled storage: Maintain stable humidity in laminate storage areas. Track storage duration and rotate stock appropriately.
- Process standardization: Document adhesive application rates, tack times, and pressing procedures. Variation causes inconsistent quality.
- Edge banding equipment calibration: Regularly verify edge banding temperature and pressure settings. Incorrect settings cause weak bonds.
- Final inspection checklist: Implement standardized inspection before dispatch covering all failure modes discussed above.
- Customer feedback loop: Track warranty claims and field complaints to identify specification or process improvements.
Design Ideas Suitable for Indian Homes
Door laminate selection should complement your overall interior design while accounting for practical requirements. Here are ideas organized by style and room type.
Contemporary Minimalist Doors
Solid neutral colors (white, grey, beige) in matte finish create clean lines. Use the same laminate across all interior doors for visual continuity. Conceal hinges where possible. Works well in urban apartments with compact spaces.
Wood-Grain Classic Doors
Oak, walnut, or teak pattern laminates suit traditional Indian homes and work well with wooden furniture. Choose synchronized texture laminates where the texture pattern matches the visual grain for realism. Apply to both face and edges for authenticity.
Two-Tone Modern Doors
Combine contrasting laminates—dark frame border with light center panel or vice versa. Requires precise cutting and careful edge treatment at the junction. Matte finishes work better than gloss for this application.
Textured Statement Main Doors
Leather-look or stone-texture laminates create impact at the entrance. Use 1mm+ thickness for durability. Ensure the pattern scale is appropriate for door size—small patterns may look busy on large doors.
Bathroom Door Solutions
Light-colored matte laminates help small bathrooms feel larger. Avoid dark colors that show water spots. Ensure bottom edge has adequate floor clearance (10-15mm minimum) and complete edge sealing. Consider PVC-edge banding for additional moisture protection.
Kitchen Entrance Integration
Match kitchen entrance doors with kitchen cabinet laminates for visual flow. Anti-fingerprint finishes reduce cleaning frequency. Matte or fine texture in medium tones hides cooking residue better than high gloss or white.
Children's Room Creativity
Digital print laminates allow custom designs, patterns, or even educational graphics. Choose high-abrasion-resistant variants. Matte finish hides inevitable scratches. Consider applying a sacrificial layer that can be replaced as children grow.
Home Office Doors
Professional neutral colors establish work-from-home boundaries. Acoustic core doors with laminate face provide sound reduction. Solid colors or subtle textures photograph better for video call backgrounds.
FAQs
What is the ideal thickness for door laminate sheets in residential use?
For most residential interior doors in dry areas, 0.8mm thickness provides adequate durability at reasonable cost. However, bathroom doors, kitchen entrance doors, main entrance doors, and doors in high-traffic areas benefit from 1mm thickness, which offers better impact resistance and edge durability. The additional cost of thicker laminate is usually justified by extended lifespan and reduced maintenance needs. Never go below 0.8mm for any door application, and consider 1.5mm for commercial or very high-use residential doors.
Can laminate sheets be applied to existing old doors?
Yes, laminate sheets can refresh existing doors, making this a cost-effective renovation option. However, success depends on the existing door's condition. The substrate must be flat (within 3mm tolerance), structurally sound, and free from active moisture damage or warping. Surface preparation is critical—remove any loose paint or finish, sand lightly for adhesive grip, and fill any dents or gouges. If the existing door is hollow-core with thin faces, verify the faces can support laminate adhesion. Severely damaged doors should be replaced rather than re-laminated.
How long do door laminate sheets typically last?
With proper installation and maintenance, door laminates in interior dry areas typically last 10-15 years before showing significant wear. Bathroom and kitchen door laminates may need attention in 7-10 years due to moisture exposure. Main entrance doors face the shortest lifespan if exposed to weather. Factors affecting longevity include laminate quality, adhesive quality, edge sealing effectiveness, daily use intensity, and maintenance habits. Poor installation can cause failure within 2-3 years regardless of material quality. Regular inspection and prompt attention to edge lifting can significantly extend functional life.
Is it better to use laminate sheets or pre-laminated doors?
Pre-laminated doors (factory-finished complete doors) offer consistent quality and faster installation but limited customization. On-site laminate sheet application provides design flexibility and works for renovation projects but depends heavily on carpenter skill. For new construction with standard door sizes, pre-laminated doors often provide better value and consistent quality. For renovation, custom sizes, or specific design matching requirements, on-site laminate application is necessary. Factory edge finishing on pre-laminated doors is typically more reliable than field edge banding, making them preferable for humid climates.
What type of adhesive should be used for door laminate installation?
Contact cement (rubber-based adhesive applied to both surfaces and allowed to tack before bonding) is the traditional choice for laminate application. For superior moisture resistance, especially in bathroom and kitchen applications, specify synthetic rubber-based or neoprene-based contact adhesives rather than basic varieties. PVA-based laminate adhesives are also used but require clamping during cure time. In coastal areas or very humid climates, verify the adhesive is specifically rated for moisture resistance. Avoid generic multi-purpose adhesives that may lack adequate bond strength or moisture resistance.
How do you maintain laminate doors during monsoon season?
Monsoon maintenance focuses on preventing moisture accumulation and promptly addressing any water contact. Wipe down doors daily during monsoon to remove condensation and humidity deposits. Check edges weekly for any signs of lifting or water entry. Ensure bathroom exhaust fans work properly to reduce humidity. Keep a small gap under bathroom doors to allow air circulation while preventing water splash. Address any edge damage immediately—even minor lifting allows monsoon humidity to enter and accelerate failure. Consider applying a thin bead of clear silicone sealant along floor-level edges if water contact risk is high.
Can door laminates be repaired if damaged?
Minor laminate damage can often be repaired, but success varies with damage type. Small edge lifting can be re-glued by cleaning the separated area, applying fresh adhesive, and pressing firmly for 24 hours. Small scratches on matte surfaces may be less visible after applying furniture polish. Deep scratches, chips, or bubbles typically require removing and replacing the affected laminate section. Complete re-laminating of one face is sometimes more practical than patching. Color matching for repairs is challenging—patches may be visible even with same-batch material. Prevention through proper installation and maintenance is always preferable to repair.
What is the difference between HPL and LPL for doors?
High-Pressure Laminate (HPL) and Low-Pressure Laminate (LPL) differ in manufacturing process, resulting in different performance characteristics. HPL is manufactured at 70-100 bar pressure, creating a denser, harder surface with superior scratch, impact, and moisture resistance. LPL manufactured at 20-30 bar is thinner, less durable, and more affordable. For door applications, HPL is recommended for main doors, bathroom doors, kitchen doors, and any high-use location. LPL may be acceptable for interior bedroom doors with light use. The price difference (typically 20-40% more for HPL) is usually justified by performance in most applications.
How should laminate sheets be stored before installation?
Proper storage prevents damage and ensures successful installation. Store sheets flat on a level surface—never leaning against walls, which causes warping. Keep sheets in a dry, covered area away from direct sunlight. If sheets arrive from a location with different humidity levels, allow 48-72 hours at the installation site before application to reach moisture equilibrium. Keep protective packaging intact until ready to use. Stack sheets neatly with protective material between glossy surfaces to prevent scratching. Do not store heavy materials on top of laminate stacks. Ideal storage temperature is 15-30°C with relative humidity below 70%.
Are antibacterial door laminates worth the extra cost?
Antibacterial laminates contain additives that inhibit bacterial growth on the surface. These are most justified for healthcare facilities, food service areas, schools, and homes with immunocompromised family members. For typical residential door applications, the premium (often 30-50% higher than standard laminates) may not be necessary if regular cleaning habits are maintained. Antibacterial properties do not eliminate cleaning requirements—they reduce bacterial growth between cleanings. If considering antibacterial laminate for residential use, prioritize bathroom doors and kitchen entrance doors where hygiene concerns are highest.
Can laminate be applied on both sides of a hollow-core door?
Laminate can be applied to hollow-core flush doors, but several precautions apply. The door faces must be thick enough (typically 3mm+ plywood or HDF facing) to provide adequate adhesive bonding surface. Laminating both faces with the same thickness laminate helps maintain balance and reduces warping risk. Ensure the door core structure can support hardware loads—hollow cores with thin faces may not hold hinges and locks adequately after laminating adds weight. For best results, apply laminate to both faces in the same session to maintain moisture balance. Edge banding should wrap to both faces for complete moisture protection.
What causes white marks on door laminates and how to prevent them?
White marks on laminates typically result from heat exposure, moisture penetration, or chemical contact. Hot cups or vessels placed against laminate surfaces can leave white marks (heat damage). Moisture trapped under laminate or entering through unsealed edges causes white clouding (moisture damage). Cleaning products containing bleach or ammonia can cause white discoloration on some laminates (chemical damage). Prevention includes using coasters for hot items, maintaining proper edge sealing, and cleaning only with mild soap solutions. Once white marks appear from heat or moisture damage, they typically cannot be removed—the only solution is re-laminating the affected area.
Disclaimer: This content is provided for general informational purposes based on industry practices and publicly available information. Product specifications, standards, prices, and availability may vary by manufacturer, region, and time. Readers should independently verify details with manufacturers, dealers, or qualified professionals before making purchase or construction decisions.
Want Plywood Suggestions?
Share a few details and a VIR MDF specialist will suggest suitable brands and connect you to responsive dealers.