Sunmica – Complete Guide for Indian Buyers
Clear, research-backed explanation of sunmica with examples, FAQs, and practical tips for Indian homes and furniture work.
Note: This is independent informational content and is not affiliated with any manufacturer.
Quick Decision Summary
Best answer in one line: Sunmica is a brand name that became synonymous with high-pressure decorative laminates in India, used to cover furniture, walls, and kitchen surfaces.
If you're in a hurry: When your carpenter or dealer says "sunmica," they typically mean decorative laminate sheets—thin, durable surface materials pressed onto plywood, MDF, or particle board. The term has become generic in India, similar to how "xerox" means photocopy. Focus on laminate thickness (0.7mm–1.0mm for furniture), surface finish (matte or gloss), and substrate quality rather than just the brand name. Always verify moisture resistance claims for kitchen and bathroom applications.
- Choose this if: You want affordable, scratch-resistant surfaces with wide design variety for wardrobes, kitchen shutters, wall panels, or furniture in dry to moderately humid conditions.
- Avoid this if: You need waterproof surfaces for direct water exposure, want the natural texture of real wood veneer, or require heat resistance above 180°C for countertop applications near cooking zones.
What Sunmica Actually Means in Indian Market Terms
Sunmica is a brand of high-pressure laminate (HPL) that became so popular in India that the term is now used interchangeably with "laminate" across the country. This is similar to how "Fevicol" is used for adhesive or "Bisleri" for bottled water. When contractors, carpenters, or dealers mention sunmica, they typically mean any decorative laminate sheet, regardless of the actual manufacturer.
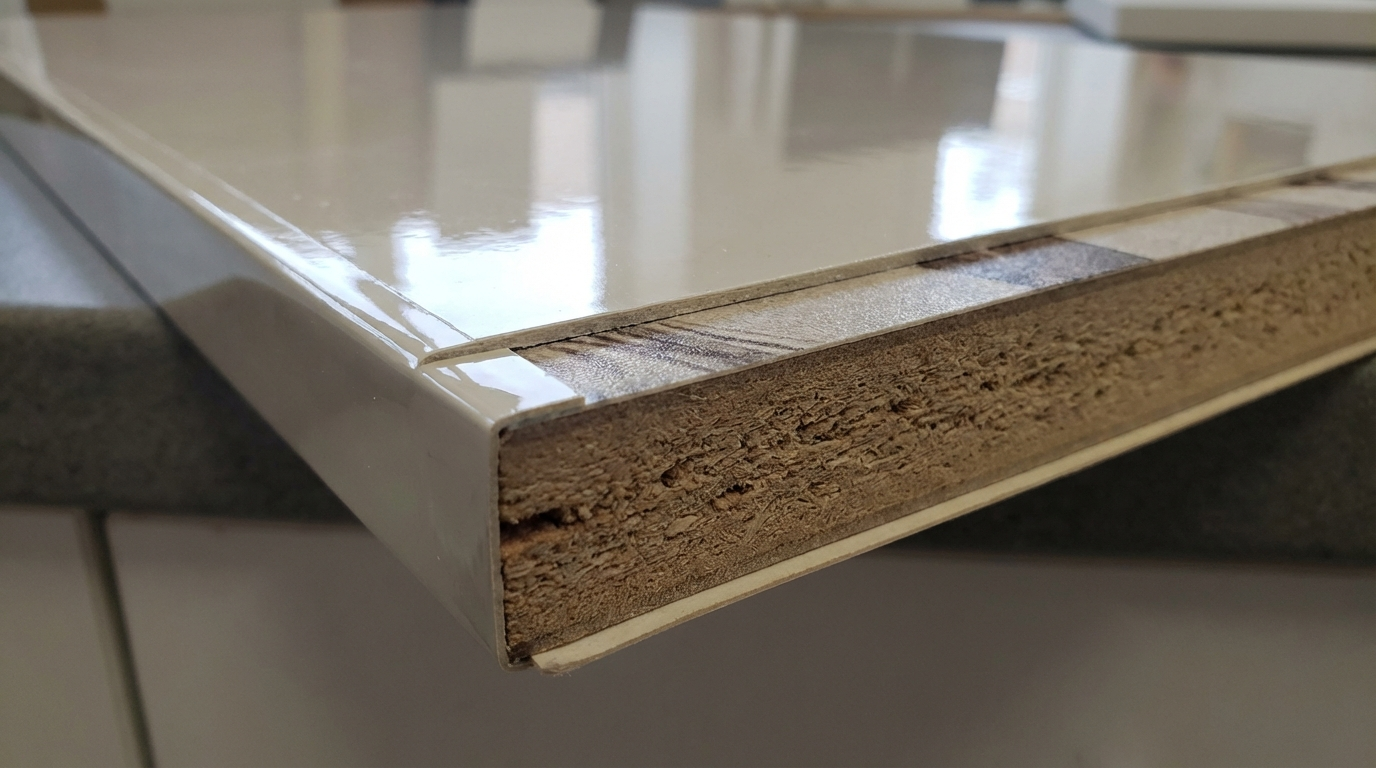
High-pressure laminates are manufactured by pressing multiple layers of kraft paper (base layers) and decorative paper (top layer) together with phenolic and melamine resins under high heat and pressure. The result is a thin, rigid sheet—typically 0.6mm to 1.5mm thick—that can be bonded to substrates like plywood, MDF, particle board, or blockboard using contact adhesives or PVA-based glues.
Understanding this distinction matters because you might get quotes mentioning "sunmica" when the actual product is from a different laminate manufacturer. The quality, finish consistency, and durability can vary significantly between manufacturers, even within similar price ranges. Always ask for the specific brand and grade being offered rather than accepting generic "sunmica" descriptions.
Is Sunmica the Same as Laminate or Are They Different Products?
Sunmica and laminate are essentially the same product category—the former is a brand name that became genericized. All sunmica is laminate, but not all laminate is from the Sunmica brand. The confusion arises because Indian markets have used the term for decades without distinguishing between manufacturers. When evaluating options, focus on laminate specifications rather than brand names alone. Key specifications include thickness (affects durability), surface finish type, core composition, and whether it carries any moisture-resistant treatment. Always request sample sheets to compare actual quality before ordering full quantities for your project.
Why Sunmica Matters in Indian Homes and Site Conditions
Indian construction and furniture work operates under conditions that differ significantly from Western markets. High ambient humidity during monsoon months (often 70–95% relative humidity in coastal and eastern regions), inconsistent site storage, and variable workmanship quality all affect how laminate performs over time.
Laminates provide a protective barrier against moisture penetration, scratches, and stains on furniture surfaces. However, this protection is only effective when the laminate is properly bonded to a suitable substrate and the edges are adequately sealed. In Indian conditions, the weakest points are typically the edges and joints where moisture can enter and cause the substrate to swell or delaminate.
How Does Monsoon Humidity Affect Laminate Furniture in India?
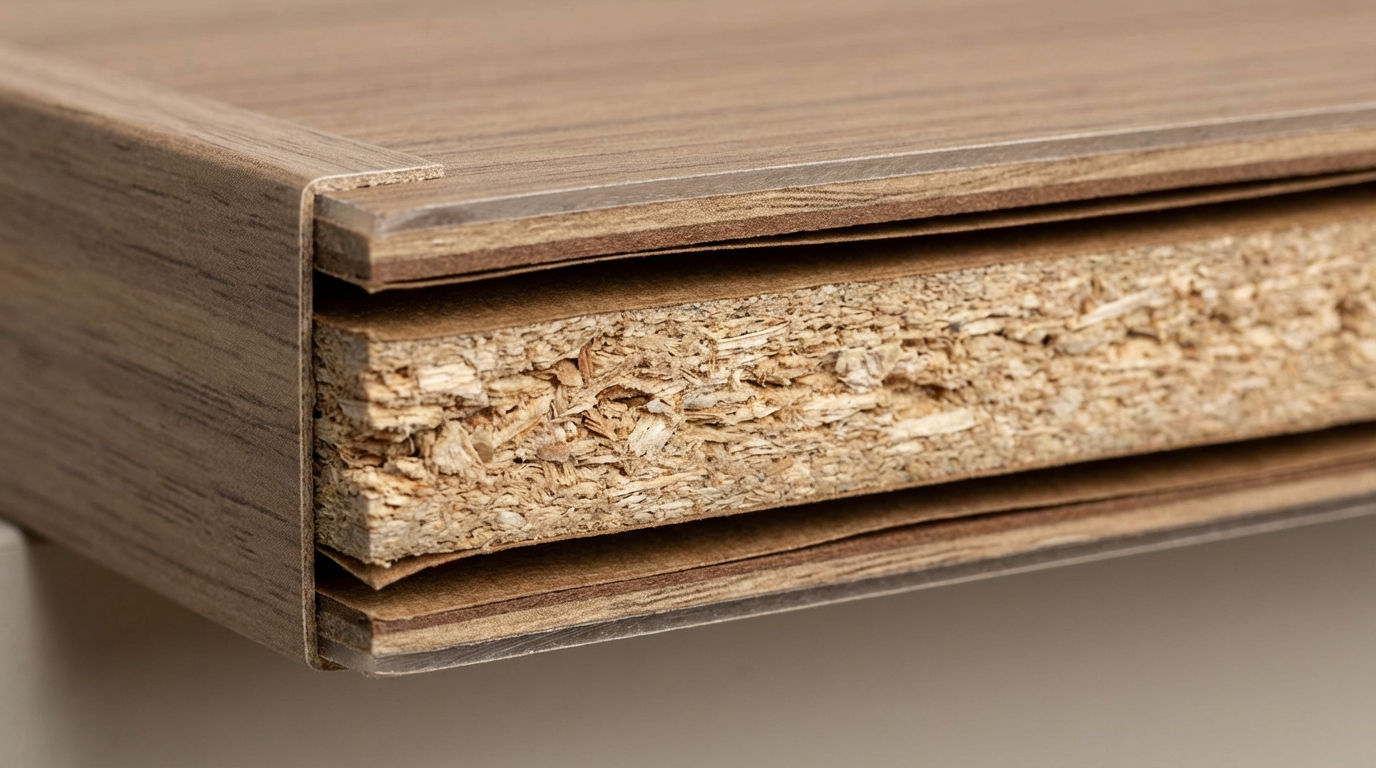
Monsoon humidity primarily affects the substrate beneath the laminate rather than the laminate surface itself. Plywood, MDF, and particle board can absorb moisture through exposed edges, screw holes, and improperly sealed joints. This causes swelling, warping, and eventual delamination of the laminate surface. Prevention requires choosing moisture-resistant substrates (BWR plywood or HDFWR boards), sealing all edges with edge banding or sealant, and ensuring adequate ventilation in storage areas. During monsoon months, avoid storing laminate sheets in ground-floor godowns or areas with visible dampness. Check for edge discoloration or waviness before accepting delivery.
Coastal cities face additional challenges from salt-laden air, which can accelerate corrosion of metal hardware and affect adhesive bond strength over time. Projects in Chennai, Mumbai, Kolkata, Kochi, and similar coastal areas should budget for better-quality hardware and more thorough edge sealing.
Types of Laminates Available in Indian Markets
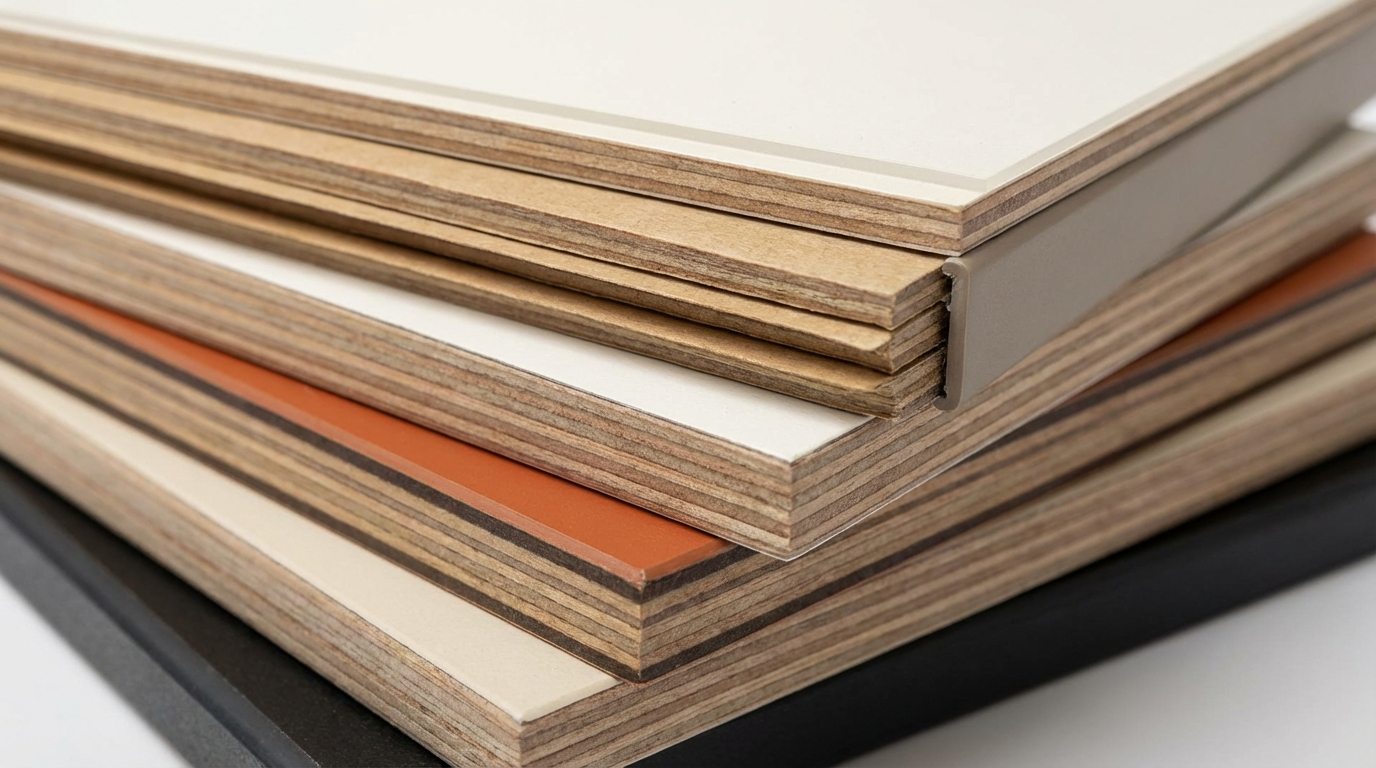
Understanding the different laminate types helps you match the right product to your specific application. Indian markets offer several categories based on manufacturing process, thickness, and surface characteristics.
High-Pressure Laminate (HPL)
HPL is the most common type for furniture and interior applications. It is manufactured at pressures above 1,000 psi and offers good scratch and wear resistance. Standard thickness ranges from 0.7mm to 1.0mm for furniture applications, with thicker grades (1.0mm–1.5mm) used for high-wear surfaces or postforming applications.
Low-Pressure Laminate (LPL)
Also called melamine-faced boards or pre-laminated boards, LPL involves fusing decorative paper directly onto particle board or MDF during the board manufacturing process. This creates a single bonded unit rather than a separate laminate sheet. LPL is more economical but offers lower scratch resistance and limited design variety compared to HPL.
Compact Laminate
Compact laminates are thick, self-supporting panels (typically 3mm–25mm) that do not require a substrate. They are used for toilet partitions, lockers, laboratory surfaces, and exterior cladding. These are significantly more expensive but offer superior durability and moisture resistance.
Postforming Laminate
Postforming grades are engineered to bend around curved edges when heated, eliminating the need for separate edge banding on rounded profiles. This requires specialized equipment and is typically used in modular kitchen manufacturing.
| Laminate Type | Typical Thickness | Best Applications | Limitations |
|---|---|---|---|
| HPL (Standard) | 0.7mm–1.0mm | Wardrobes, kitchen shutters, furniture surfaces | Requires substrate; edges need treatment |
| HPL (Thick Grade) | 1.0mm–1.5mm | High-traffic surfaces, commercial furniture | Higher cost; harder to cut without chipping |
| LPL/Pre-laminated | Integrated with board | Budget furniture, quick installations | Lower scratch resistance; limited designs |
| Compact Laminate | 3mm–25mm | Toilet partitions, lab surfaces, lockers | High cost; requires specialized cutting |
| Postforming | 0.6mm–0.8mm | Curved edges, modular kitchens | Needs heating equipment; higher wastage |
Price Range and Cost Drivers for Laminates in India
Laminate pricing in India varies significantly based on multiple factors. Understanding these drivers helps you budget accurately and recognize when pricing seems unusual.
What Is the Typical Price Range for Sunmica Laminates Per Square Foot?
Standard decorative laminates typically range from ₹40 to ₹150 per square foot for common residential grades. Premium finishes like high-gloss, textured woodgrain, or anti-fingerprint coatings can push prices to ₹150–₹300 per square foot. Compact laminates and specialized grades (fire-retardant, antibacterial) command even higher prices. These ranges fluctuate based on brand, finish complexity, order quantity, and regional distribution costs. Always get quotes from multiple dealers and compare like-for-like specifications rather than just brand names. Factor in wastage (typically 10–15% for furniture work) and edge banding costs when budgeting.
Key Cost Drivers
- Thickness: Thicker laminates cost more but offer better durability and easier handling during installation.
- Surface Finish: High-gloss, textured, and synchronized finishes cost more than standard matte or satin options.
- Design Complexity: Realistic wood grains, marble patterns, and custom prints are priced higher than solid colors.
- Moisture/Fire Resistance: Treated grades for wet zones or fire-rated applications add 20–40% to base prices.
- Brand Premium: Established brands typically cost 10–25% more than lesser-known manufacturers.
- Order Quantity: Bulk orders (100+ sheets) often receive 5–15% discounts.
- Location: Prices in tier-2 and tier-3 cities may include additional logistics costs.
Sample Budget Calculation for a Standard Wardrobe
For a 7-foot × 6-foot three-door wardrobe with internal shelves:
- External laminate area: approximately 120–140 sq ft (including both sides of shutters and visible panels)
- At ₹80 per sq ft (mid-range laminate): ₹9,600–₹11,200
- Edge banding (PVC, 1mm): approximately 80 running feet × ₹8 = ₹640
- Wastage allowance (12%): ₹1,150–₹1,350
- Total laminate budget: ₹11,400–₹13,200 (excluding substrate, hardware, and labor)
Decision Framework: Choosing the Right Laminate for Your Conditions
Different applications and environments demand different laminate specifications. This framework helps you match conditions to appropriate choices.
| Condition/Scenario | Recommended Choice | What to Verify |
|---|---|---|
| Kitchen cabinets (dry areas) | Standard HPL 0.8mm+ on BWR plywood; matte or satin finish | Check substrate grade; ensure edge banding on all exposed edges |
| Kitchen near sink/wet zone | HPL on marine plywood or HDFWR; PVC edge banding mandatory | Verify marine/BWR grade stamp; check adhesive compatibility |
| Wardrobe in humid bedroom | Standard HPL on BWR plywood; ventilation gaps in back panel | Ensure ventilation holes; check for closed edges on all panels |
| Coastal city installation | HPL with moisture-resistant core; stainless steel hardware | Request moisture-resistant documentation; check hardware grade |
| High-traffic commercial use | 1.0mm+ HPL; scratch-resistant grade; dark patterns hide wear | Ask for abrasion resistance rating; check wear layer thickness |
| Bathroom vanity | Compact laminate or HPL on marine ply with sealed edges | No exposed substrate edges; silicone seal at wall junction |
| Tight budget project | LPL/pre-laminated boards for internal surfaces; HPL for visible only | Check pre-lam board density; avoid for high-wear surfaces |
| Fast delivery needed | Stock designs from local dealers; avoid custom prints | Confirm physical stock availability before ordering |
| Child's room furniture | HPL with scratch-resistant coating; rounded edge profiles | Check edge sharpness after banding; verify coating claims with samples |
Practical Use Cases: What Works and What Fails
Different applications have different success rates with laminate surfaces. Understanding these patterns helps you avoid common failures.
| Application | Recommended Thickness | Finish Notes | Risk Notes |
|---|---|---|---|
| Wardrobe shutters | 0.8mm–1.0mm | Matte hides fingerprints better than gloss | Hinge area stress; use proper hinge cups |
| Kitchen base units | 1.0mm | Textured finishes hide minor scratches | Water splash at sink; seal edges thoroughly |
| Kitchen wall units | 0.8mm | Light colors show grease buildup | Steam exposure from cooking; ensure ventilation |
| Study table top | 1.0mm+ | Anti-scratch coating recommended | Pen pressure and dragging; consider thicker grade |
| TV unit | 0.8mm | High-gloss popular for modern look | Shows fingerprints and dust; needs frequent cleaning |
| Wall paneling | 0.7mm–0.8mm | Woodgrain or stone patterns common | Substrate flatness critical; use WPC or ply backing |
| Shoe rack | 0.8mm | Dark colors hide scuff marks | High moisture from wet shoes; ensure drainage |
| Office workstation | 1.0mm | Scratch-resistant grade essential | Edge wear from arm contact; rounded edge profile helps |
Can Laminate Be Used for Kitchen Countertops in Indian Homes?
While laminate is commonly used for kitchen countertops in many countries, it has limitations in Indian kitchens. Direct heat from tawas, kadhai, or pressure cookers can damage laminate surfaces, causing discoloration or bubbling. Most decorative laminates are rated for only 150–180°C surface contact, which hot cookware easily exceeds. For Indian cooking patterns, granite, quartz, or solid surface materials are safer choices for the main countertop. However, laminate works well for breakfast counters, pantry surfaces, or areas away from direct cooking. If using laminate near cooking zones, always use trivets or heat pads and avoid placing hot vessels directly on the surface.
Common Buyer Mistakes and How to Avoid Them
These mistakes occur frequently in Indian furniture and interior projects. Understanding them beforehand saves significant rework costs and disappointment.
Mistake 1: Accepting Generic "Sunmica" Without Specification
Many buyers accept quotes mentioning "sunmica" without clarifying the actual brand, thickness, or grade. This allows substitution of lower-quality products. Always request specific brand name, thickness in millimeters, finish type, and grade (standard, premium, moisture-resistant). Get this in writing on the quotation.
Mistake 2: Ignoring Substrate Quality
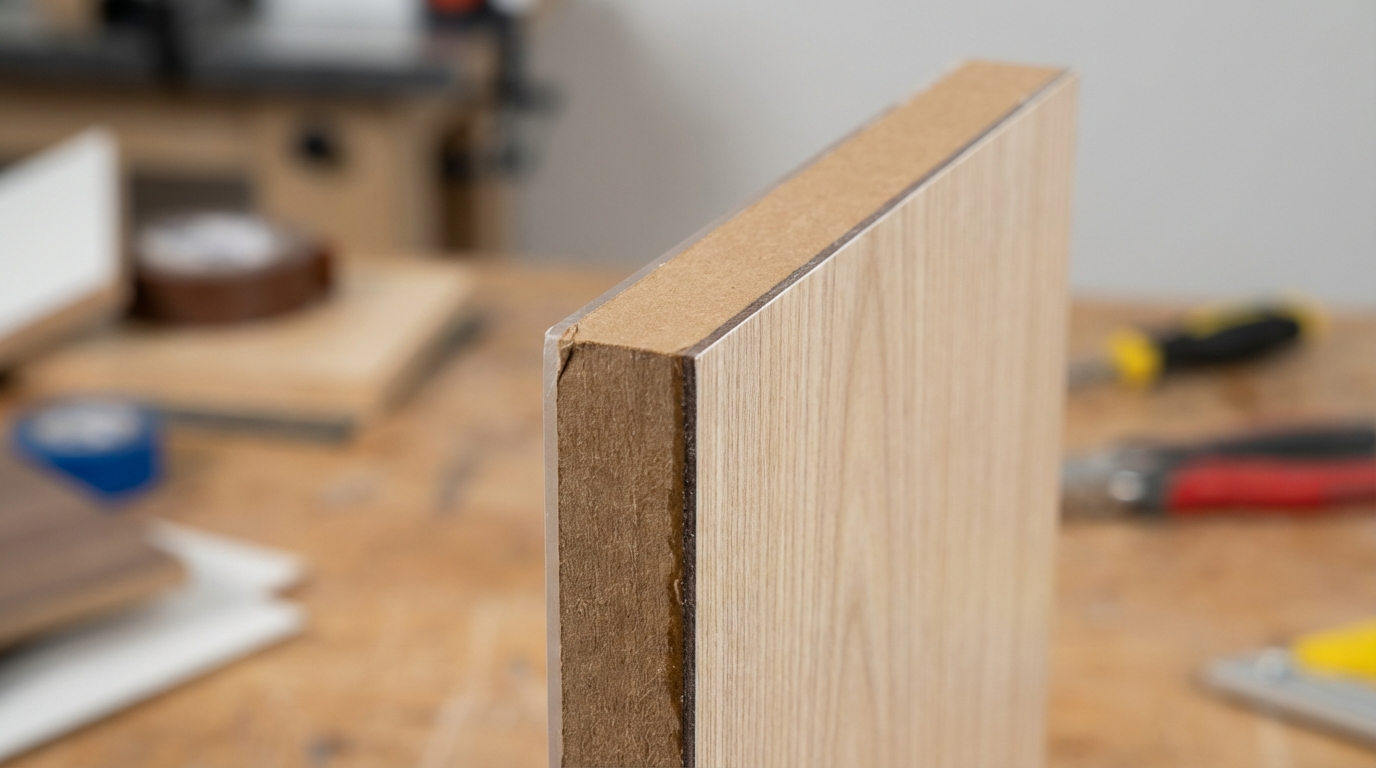
The most expensive laminate will fail if applied to poor-quality plywood or MDF. Substrate quality determines screw-holding strength, moisture resistance, and long-term flatness. Insist on checking substrate grade and stamps before lamination begins.
Mistake 3: Skipping Edge Treatment
Exposed laminate edges or poorly bonded edge banding are the primary entry points for moisture. Many budget projects skip proper edge banding to save costs, leading to swelling within months. Ensure all edges receive appropriate treatment—PVC edge banding, ABS strips, or at minimum, edge sealant.
Mistake 4: Choosing High-Gloss for High-Touch Areas
High-gloss laminates look stunning in showrooms but show every fingerprint, dust particle, and minor scratch in daily use. For wardrobes, kitchen shutters, and areas frequently touched, matte or textured finishes are far more practical.
Mistake 5: Not Accounting for Pattern Matching
Wood grain and marble pattern laminates require careful alignment across multiple sheets to look natural. Failure to plan pattern direction and matching points results in obvious misalignment. Discuss pattern matching requirements with your carpenter before cutting begins.
Mistake 6: Ignoring Thermal Expansion
Large laminate panels (especially dark colors) expand and contract with temperature changes. In sun-facing areas or near windows, this can cause warping or edge lifting. Leave slight expansion gaps at fixed points and avoid using dark laminates in direct sunlight zones.
Mistake 7: Storing Laminate Sheets Incorrectly
Laminates should be stored flat, off the ground, in dry conditions. Stacking on uneven surfaces or storing in damp godowns causes warping before installation. Verify storage conditions if laminate is being held at site for extended periods.
Mistake 8: Using Wrong Adhesive
Contact adhesive (rubber-based) is standard for laminate bonding, but quality varies significantly. Poor adhesive causes bubbling, edge lifting, and delamination. Specify branded adhesive and ensure the carpenter uses adequate coverage and proper drying time before contact.
Failure Modes and Fixes for Laminate Surfaces
Understanding how laminates fail helps you prevent problems and address them early when they occur.
Failure Mode 1: Edge Swelling and Delamination
Symptom: Edges become puffy, laminate lifts, or substrate visibly swells.
Root Cause: Moisture penetration through unsealed edges, typically from wet cleaning, sink splash, or humid storage.
Prevention: Apply PVC edge banding on all exposed edges; use moisture-resistant substrate for wet zones; avoid wet mopping near furniture bases.
If Already Happening: Minor swelling can be addressed by drying thoroughly and resealing edges. Severe swelling requires replacing the affected panel—laminate cannot be re-bonded to swollen substrate.
Failure Mode 2: Surface Bubbling
Symptom: Raised areas or bubbles appear on the laminate surface.
Root Cause: Inadequate adhesive coverage, improper drying time before contact, or air trapped during pressing.
Prevention: Ensure uniform adhesive application; allow proper drying time (touch-dry but tacky); use roller pressure during bonding.
If Already Happening: Small bubbles can sometimes be flattened with heat (iron through cloth) and re-pressed. Large bubbles require lifting the laminate section and re-bonding, which often damages the surface.
Failure Mode 3: Laminate Chipping During Cutting
Symptom: Rough, chipped edges after cutting, especially on cross-cuts.
Root Cause: Dull blade, wrong blade type, incorrect cutting direction, or insufficient support during cutting.
Prevention: Use sharp, fine-toothed blades designed for laminate; cut with decorative face up on table saw, face down on circular saw; support the sheet fully to prevent vibration.
If Already Happening: Chipped edges can be concealed with matching edge banding but cannot be repaired invisibly. Plan cuts to keep chipped edges hidden or covered.
Failure Mode 4: Adhesive Bleed-Through
Symptom: Yellowish stains or adhesive marks visible through the laminate surface.
Root Cause: Excess adhesive, wrong adhesive type, or pressing before adequate drying time.
Prevention: Apply thin, even adhesive coat; allow proper drying; avoid petroleum-based adhesives on light-colored laminates.
If Already Happening: Bleed-through is permanent and cannot be cleaned. The affected laminate section must be replaced.
Failure Mode 5: Hinge Area Failure
Symptom: Laminate cracking or substrate damage around hinge mounting points.
Root Cause: Screws too close to laminate edge, insufficient substrate thickness at hinge point, or repeated stress from heavy doors.
Prevention: Use proper hinge cups designed for laminated panels; ensure adequate edge distance; use soft-close hinges to reduce impact stress.
If Already Happening: Relocate hinges to fresh substrate area; fill damaged holes with wood filler before repositioning.
Failure Mode 6: Color Fading
Symptom: Gradual loss of color intensity, especially in sun-exposed areas.
Root Cause: UV exposure, particularly on dark colors and certain pigment types.
Prevention: Use UV-resistant grades for sun-facing applications; install curtains or films on windows; choose lighter colors for high-exposure areas.
If Already Happening: Fading is irreversible. Panel replacement is the only solution for severely faded surfaces.
Quality Checks You Can Do Without Lab Tests
These practical checks help you evaluate laminate quality at purchase, during installation, and after completion.
Before Buying
- Visual inspection: Check sheets for surface scratches, dents, or printing defects. View at an angle under good lighting.
- Edge examination: Look for delamination at sheet edges or core discoloration.
- Flexibility test: Quality laminate should flex slightly without cracking when bent gently. Brittle laminate indicates poor resin quality or age.
- Batch consistency: If ordering multiple sheets, verify they are from the same batch for color consistency.
- Storage condition check: Verify the dealer stores laminate flat and dry. Warped sheets indicate poor storage.
- Sample comparison: Compare delivered sheets against approved samples for color and finish match.
After Cutting
- Edge quality: Clean cuts show uniform core color without excessive chipping or fraying.
- Core inspection: The core should appear dense and uniform. Visible voids or inconsistent color suggest quality issues.
- Dust characteristics: Cutting dust should be fine and uniform. Coarse or fibrous dust may indicate lower density core.
After Installation
- Surface flatness: Run your hand across the surface to detect bubbles, ridges, or unevenness.
- Edge bonding: Check that edge banding is firmly attached with no gaps or lifting.
- Joint alignment: Pattern alignment across multiple panels should be consistent.
- Hardware function: Doors should close smoothly without stress on hinges or laminate.
Tips by User Type
For Homeowners
- Clean laminate surfaces with damp cloth and mild soap; avoid abrasive cleaners or scrubbing pads.
- Wipe water spills immediately, especially near edges and joints.
- Use felt pads under decorative items to prevent scratching.
- Avoid placing hot items directly on laminate surfaces.
- Open wardrobe doors periodically in humid seasons to allow air circulation.
- Do not use polish or wax products—they create buildup that attracts dust.
- Address loose edge banding immediately before moisture enters.
For Carpenters
- Always cut laminate with the decorative face positioned to minimize chipping (face up for table saw, face down for circular saw).
- Apply contact adhesive to both surfaces and allow proper drying time before pressing.
- Use J-roller or rubber mallet (through cloth) to ensure complete adhesive contact.
- Leave 2–3mm overhang when bonding, then trim flush with router or file.
- Pre-drill for screws near laminate edges to prevent cracking.
- Store laminate sheets flat and off ground to prevent warping.
- Match grain direction across adjacent panels before cutting.
- Use backing laminate on reverse side for large panels to prevent warping.
For Architects and Interior Designers
- Specify laminate by brand, thickness, finish code, and grade—not generic "sunmica."
- Include edge banding specifications in your BOQ with material type and thickness.
- Note substrate requirements (BWR plywood, HDFWR, marine grade) for different zones.
- Avoid specifying dark high-gloss laminates for vertical surfaces in residential projects—maintenance complaints are common.
- For large panel applications, specify backing laminate to balance the panel.
- Include ventilation requirements for wardrobe backs and base cabinet plinths.
- Request laminate samples for client approval before finalizing orders.
For OEM and Modular Manufacturers
- Establish incoming quality checks for laminate batches—surface defects, thickness consistency, color matching.
- Implement cut sheet optimization software to minimize wastage (target below 12%).
- Train operators on proper adhesive application and drying times.
- Use jigs and fixtures for consistent hinge boring positions.
- Install dust collection at cutting stations to improve visibility and reduce defects.
- Document laminate batch numbers for traceability if quality issues arise after installation.
- Stock common replacement panels for post-installation service requirements.
Design Ideas You Can Actually Execute
These ideas work within typical Indian carpentry capabilities and material availability.
Kitchen Applications
- Two-tone shutters: Light color on wall units, wood-finish on base units. Creates visual balance and hides wear on lower cabinets.
- Handleless profiles: J-pull or G-profile aluminum channels with matte laminate for clean contemporary look.
- Glass-laminate combination: Frosted glass inserts in laminate frame doors for display units.
- Textured backsplash panels: Stone-texture laminate on backing board as cost-effective backsplash alternative to tiles.
Wardrobe Applications
- Loft contrast: Different laminate shade on loft sections creates visual separation and adds interest.
- Mirror-laminate panels: Alternating mirror and laminate panels on sliding wardrobe doors.
- Internal color coding: Light-colored laminate inside for better visibility; darker exterior for style.
- Leather-finish laminate: Textured leather-look laminate on wardrobe handles adds tactile interest.
Living Room Applications
- Feature wall paneling: Vertical wood-grain laminate panels with concealed LED strip lighting at edges.
- TV unit with back panel: Extended laminate back panel behind wall-mounted TV conceals wiring and adds depth.
- Floating shelves: Laminated shelves with hidden brackets for minimalist display.
- Window seat storage: Laminated bench with lift-up seat for storage in bay window areas.
Home Office Applications
- Cable-managed desk: Laminate desk with integrated cable tray and grommet holes.
- Pegboard accent: Laminated pegboard panel for flexible organization in study nook.
- Dual-finish desk: Wood-grain laminate top with solid color laminate on drawers.
FAQs
What is the full form of sunmica and what does it mean?
Sunmica does not have a full form—it is a brand name for decorative laminates that became genericized in Indian markets. The brand name likely derives from a combination suggesting sun resistance or surface finishing properties. Over decades of market presence, the term became synonymous with high-pressure laminates across India, regardless of actual manufacturer. When someone mentions "sunmica," they typically mean decorative laminate sheets used for furniture surfaces, kitchen cabinets, or wall paneling. Understanding this distinction helps you communicate effectively with dealers and contractors while ensuring you get the specific product quality and brand you need for your project.
How long does laminate furniture last in Indian climate conditions?
Well-made laminate furniture typically lasts 10–15 years or more with proper care and maintenance. However, longevity depends heavily on factors including substrate quality, edge sealing, installation workmanship, and usage environment. Furniture in air-conditioned rooms with controlled humidity generally outlasts pieces in non-AC spaces exposed to monsoon humidity fluctuations. Kitchen furniture near sinks and cooking zones faces accelerated wear compared to bedroom wardrobes. Regular maintenance—wiping spills immediately, avoiding harsh chemicals, addressing loose edge banding promptly—significantly extends furniture life. Coastal cities may see shorter lifespans due to salt air exposure affecting both hardware and adhesive bonds.
Can I apply laminate over old laminate surfaces?
Applying new laminate over existing laminate is possible but requires careful preparation and is not always recommended. The old surface must be thoroughly cleaned, degreased, and lightly sanded to create adhesion. Any peeling, bubbling, or damaged areas must be repaired or removed completely. The additional thickness (approximately 1mm) affects door alignment, drawer clearance, and edge profiles, requiring adjustment. For best results, remove old laminate down to the substrate, repair any substrate damage, then apply new laminate. Direct overlay works better for flat surfaces than for complex furniture with multiple moving parts. Consult an experienced carpenter to assess whether your specific situation warrants overlay or complete re-lamination.
What is the difference between 0.8mm and 1.0mm laminate thickness?
The 0.2mm difference between these common thicknesses affects durability, handling, and application suitability. The 1.0mm laminate offers approximately 25% more wear layer, making it more resistant to scratches and impact damage over time. It is easier to handle during installation with less risk of cracking during bonding. However, it costs approximately 15–25% more and is slightly harder to trim flush after application. For high-wear surfaces like desk tops, kitchen counters, and commercial furniture, 1.0mm is typically recommended. For vertical surfaces like wardrobe shutters, wall panels, and areas with lighter use, 0.8mm provides adequate durability at lower cost. Both thicknesses require proper substrate preparation and edge treatment for optimal performance.
Why does my laminate furniture have a chemical smell?
New laminate furniture often emits a mild chemical odor from the resins used in laminate manufacturing and the adhesives used during bonding. This is typically formaldehyde or other volatile organic compounds (VOCs) off-gassing from the materials. The smell usually dissipates within 2–4 weeks in well-ventilated spaces. To speed up the process, keep windows open, run exhaust fans, and avoid sealing the room. If the smell persists strongly beyond a month or causes respiratory irritation, it may indicate excessive formaldehyde levels from substandard materials. Quality laminates and adhesives meet emission standards and produce minimal odor. For sensitive individuals, request E1 or E0 emission-rated materials and allow furniture to air out in a separate space before moving into the main room.
How do I clean stubborn stains from laminate surfaces?
Most stains on laminate surfaces can be removed with appropriate cleaning methods without damaging the surface. For general cleaning, use a soft cloth with mild soap solution, wiping in the direction of any surface texture. For stubborn stains like ink, marker, or adhesive residue, apply a small amount of isopropyl alcohol or acetone-free nail polish remover on a cloth—not directly on the surface. Test in an inconspicuous area first. Avoid abrasive scrubbers, steel wool, or harsh chemicals like bleach, which can damage the decorative surface. For grease stains common in kitchens, a paste of baking soda and water applied briefly can help without scratching. Always rinse with clean water after using any cleaning agent and dry thoroughly to prevent moisture damage at edges.
Is pre-laminated particle board better than laminate on plywood?
Both options have distinct advantages depending on your priorities and application. Pre-laminated particle board (LPL) offers lower cost, uniform surface finish, and faster production since bonding is done at the factory. However, it has lower screw-holding strength, reduced moisture resistance, and limited design options compared to HPL on plywood. HPL on plywood provides superior durability, better moisture resistance (especially BWR or marine grade plywood), and access to the full range of laminate designs and finishes. For internal furniture components, shelves in dry areas, and budget-conscious projects, pre-laminated boards work adequately. For kitchen cabinets, bathroom furniture, humid environments, and pieces requiring frequent hardware adjustments, HPL on quality plywood is the better investment despite higher initial cost.
What causes laminate edges to turn black or brown over time?
Darkening at laminate edges typically indicates moisture penetration and subsequent substrate degradation. Water enters through gaps in edge banding, unsealed edges, or cracks in the laminate surface. The moisture causes oxidation and fungal growth in the substrate, visible as dark staining. Once this process begins, it progressively worsens as the damaged area absorbs more moisture. Prevention involves proper edge sealing during installation, avoiding wet cleaning methods near furniture bases, and addressing any edge banding failures immediately. For furniture already showing edge darkening, the affected substrate is likely compromised and may require panel replacement rather than surface treatment. In humid climates, applying silicone sealant at substrate-edge junctions provides additional protection against moisture ingress.
Can laminate be repaired if it gets scratched or chipped?
Minor scratches on laminate surfaces can be partially disguised using laminate repair pens or wax sticks matched to the surface color. These fill the scratch and make it less visible but do not fully restore the original finish. For deeper scratches or chips that expose the core, repair options are more limited. Small chips can be filled with color-matched wood filler, but the repair remains visible on close inspection. Large damaged areas generally require replacing the entire panel since laminate cannot be spot-repaired invisibly. Prevention is the best strategy—use cutting boards, avoid dragging items across surfaces, and apply felt pads under objects. For furniture in high-risk areas, consider textured or wood-grain finishes that naturally disguise minor wear better than solid colors or high-gloss surfaces.
How do I match laminate patterns when using multiple sheets?
Pattern matching is essential for professional-looking installations with wood grain, marble, or other directional patterns. First, verify all sheets are from the same production batch by checking batch codes—even identical product codes can have subtle color variations between batches. Lay out sheets before cutting to determine optimal pattern flow across adjacent panels. Wood grain typically flows in one consistent direction, usually vertical on tall furniture. For marble patterns, decide whether you want book-matched (mirror image at joints) or running pattern (continuous flow). Mark sheets clearly with intended position and grain direction before any cutting. Communicate pattern requirements explicitly to your carpenter with a simple sketch showing grain direction for each panel. Allow 5–10% extra material for pattern matching optimization versus random layouts.
What substrate should I use under laminate for bathroom vanities?
Bathroom vanities require substrates capable of withstanding sustained humidity and occasional water splash. Marine-grade plywood is the preferred choice, offering superior moisture resistance and dimensional stability compared to standard commercial plywood. If marine plywood is unavailable or budget-constrained, BWR (boiling water resistant) grade plywood provides adequate protection for most bathroom applications. Avoid MDF, standard particle board, or commercial plywood for bathroom furniture—these substrates swell and degrade quickly in humid environments. Additionally, ensure all edges are thoroughly sealed with PVC edge banding, including back edges that face walls. Apply silicone sealant at wall junctions to prevent water tracking behind the unit. For added protection, some fabricators apply primer or sealant to the raw substrate before lamination to create an additional moisture barrier.
Why do some laminates cost three times more than others?
Laminate pricing reflects multiple quality factors that affect performance and aesthetics. Premium laminates typically feature higher density cores, thicker wear layers, more sophisticated printing technology for realistic patterns, and better resin quality for improved scratch and stain resistance. Special properties like anti-bacterial treatment, fire retardancy, or anti-fingerprint coating add manufacturing costs. Brand reputation and distribution costs also contribute—established brands invest in quality control and market presence that budget manufacturers cannot match. Imported laminates carry additional duties and logistics costs. However, price alone does not guarantee suitability—an expensive high-gloss decorative laminate may perform worse than a moderately priced commercial-grade laminate in a high-traffic application. Match laminate grade and features to your specific application requirements rather than simply buying the most expensive option available.
Disclaimer: This content is provided for general informational purposes based on industry practices and publicly available information. Product specifications, standards, prices, and availability may vary by manufacturer, region, and time. Readers should independently verify details with manufacturers, dealers, or qualified professionals before making purchase or construction decisions.Want Plywood Suggestions?
Share a few details and a VIR MDF specialist will suggest suitable brands and connect you to responsive dealers.